
Last Updated on February 6, 2018
Hi and welcome to another tutorial from Codingdemos, in this tutorial you will learn how to create android options menu icon. If you are new to the Android options menu, then I suggest you watch the tutorial that I did on the channel that shows you how to do it.
By the end of this article, we will have an app that looks like this. (Large preview)
In this tutorial we will be using the following:
-
– Android studio version 2.3.3
– Android emulator Nexus 5X with API 24
– Minimum SDK API 16
1- Open up Android Studio and create a new project and give it a name, in our case we’ve named it (OptionsMenuIcon), choose API 16 as the minimum SDK, then choose a blank activity and click “Finish” and wait for Android Studio to build your project.
2- To be able to use a toolbar, we need to change the parent them. Open styles.xml file and change the parent theme from parent="Theme.AppCompat.Light.DarkActionBar" to parent="Theme.AppCompat.Light.NoActionBar"
< resources>
    < !-- Base application theme. -->
    < style name="AppTheme" parent="Theme.AppCompat.Light.NoActionBar">
        < !-- Customize your theme here. -->
        < item name="colorPrimary">@color/colorPrimary< /item>
        < item name="colorPrimaryDark">@color/colorPrimaryDark< /item>
        < item name="colorAccent">@color/colorAccent< /item>
    </style>

< /resources>
3- Open activity_main.xml file and add the toolbar
< android.support.v7.widget.Toolbar
        android:id="@+id/toolbar"
        android:layout_width="match_parent"
        android:layout_height="wrap_content"
        android:background="?attr/colorPrimary"
        android:minHeight="?attr/actionBarSize"
        app:popupTheme="@style/ThemeOverlay.AppCompat.Light"
        app:theme="@style/ThemeOverlay.AppCompat.Dark" />
4- Let’s create a menu file that will have the menu items, right click on res folder → New → Android resource file, give the file a name and select Menu from the Resource type dropdown list.
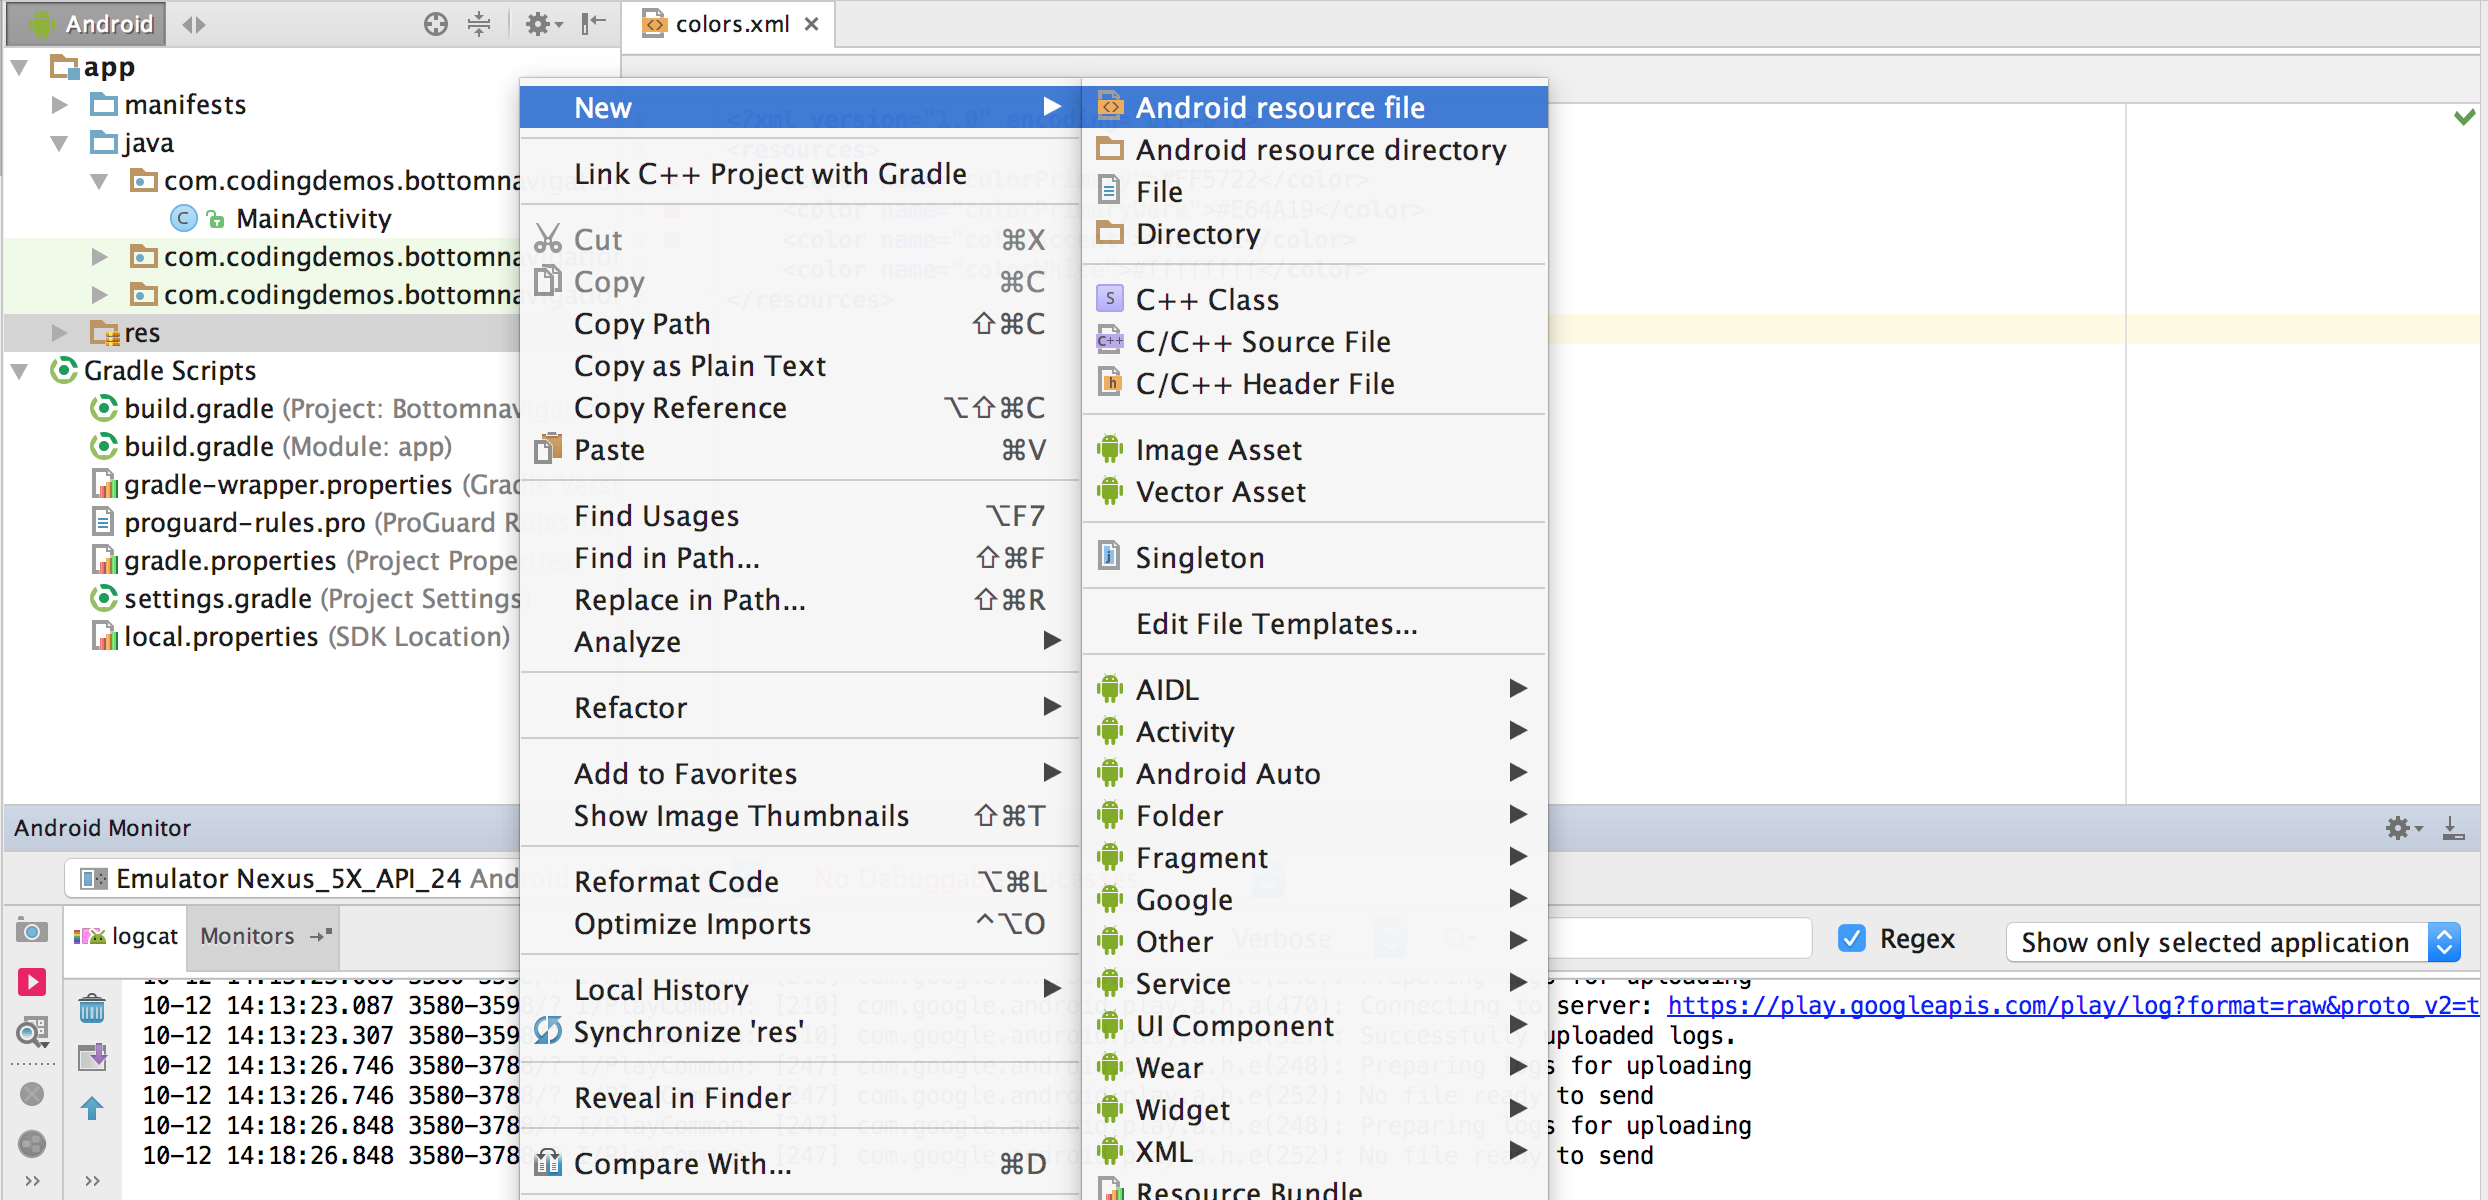
How to create menu folder and file in Android studio. (Large preview)
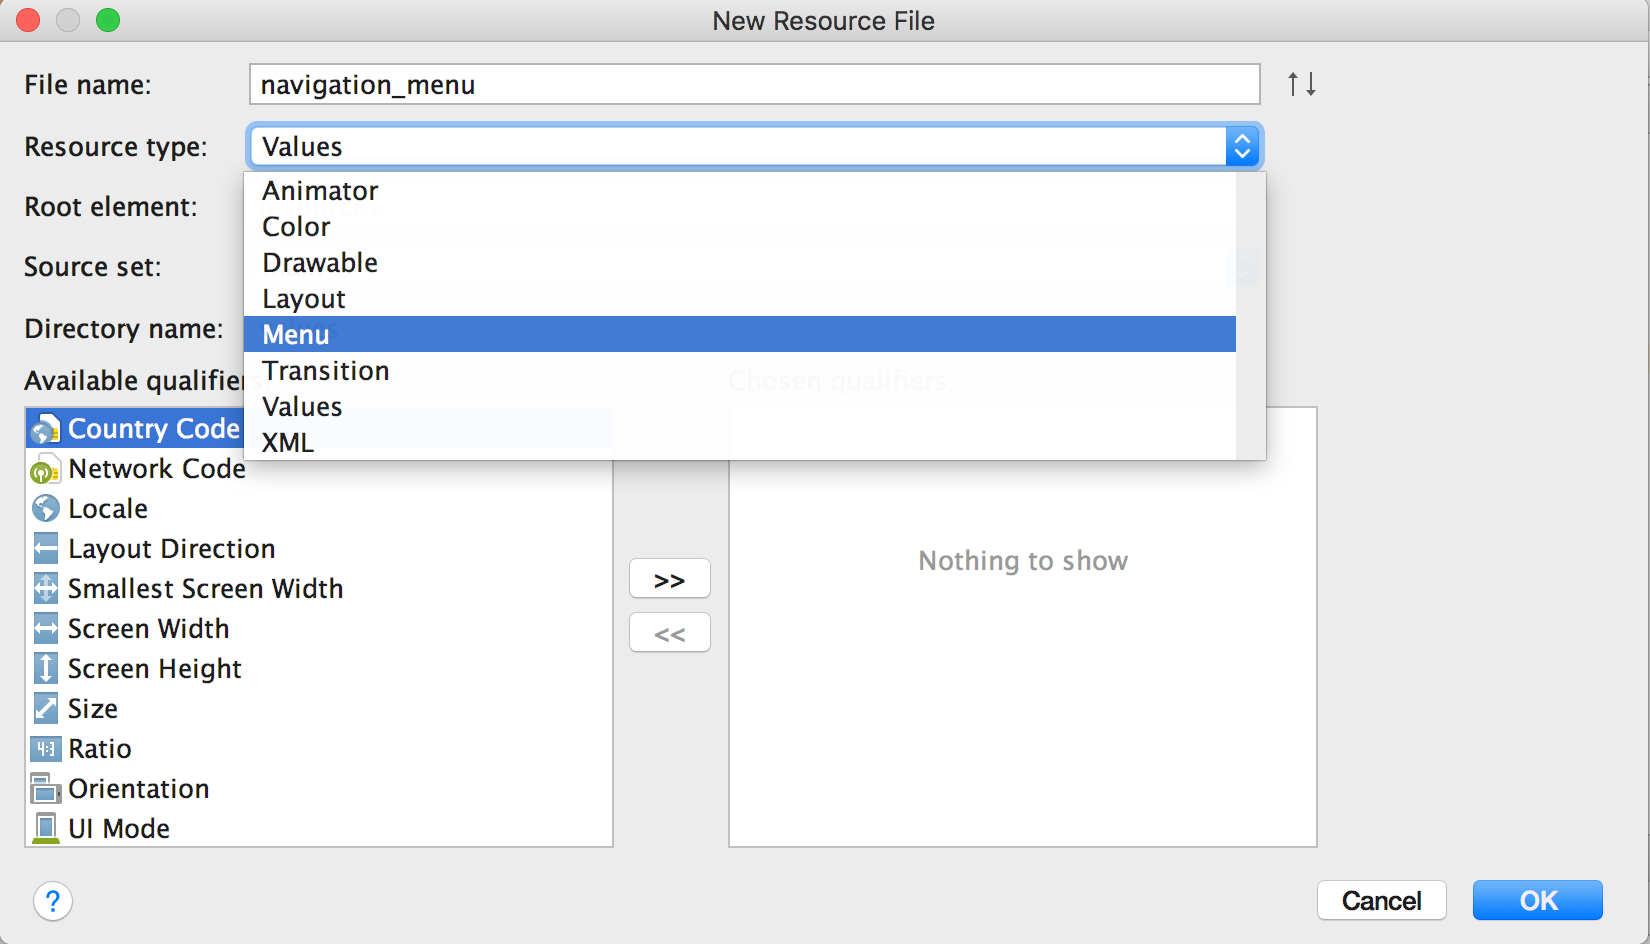
How to create a resource file in Android studio. (Large preview)
5- Next we need to look for icons that we can use them for an android menu item, thankfully android studio can help us to get those icons that we need. Click res → New → Vector Asset . Choose the icon that you want by clicking on the android icon, click “Next” button and then click “Finish”.
6- Now we can add android menu items with icons, we will have 4 menu items. 1 menu item will be the root while the other 3 menu items will be grouped under a single Menu .
< item
        android:id="@+id/action_more"
        android:icon="@drawable/ic_more_vert_white_24dp"
        android:title=""
        app:showAsAction="always">
        < menu>
            < item
                android:id="@+id/action_add_contact"
                android:icon="@drawable/ic_person_add_black_24dp"
                android:title="Add contact"
                app:showAsAction="ifRoom" />
            < item
                android:id="@+id/action_settings"
                android:icon="@drawable/ic_settings_black_24dp"
                android:title="Settings"
                app:showAsAction="ifRoom" />
            < item
                android:id="@+id/action_about_us"
                android:icon="@drawable/ic_info_outline_black_24dp"
                android:title="About us"
                app:showAsAction="ifRoom" />
        < /menu>
    < /item>
7- Open MainActivity.java file to declare the toolbar and give the toolbar the ability to have those options menu show up.
Toolbar mToolbar = (Toolbar) findViewById(R.id.toolbar);
setSupportActionBar(mToolbar);
8- Let’s create options menu by overriding onCreateOptionsMenu and inflating the menu file that we created earlier
@Override
    public boolean onCreateOptionsMenu(Menu menu) {
        getMenuInflater().inflate(R.menu.my_menu, menu);
        return super.onCreateOptionsMenu(menu);
    }
9- To be able to respond to user action, we need to override onOptionsItemSelected, so that whenever they tap on any of those menu items we show an android toast message.
@Override
    public boolean onOptionsItemSelected(MenuItem item) {
        int id = item.getItemId();
        switch (id){
            case R.id.action_add_contact:
                Toast.makeText(MainActivity.this, item.getTitle().toString(), Toast.LENGTH_SHORT).show();
                break;
            case R.id.action_settings:
                Toast.makeText(MainActivity.this, item.getTitle().toString(), Toast.LENGTH_SHORT).show();
                break;
            case R.id.action_about_us:
                Toast.makeText(MainActivity.this, item.getTitle().toString(), Toast.LENGTH_SHORT).show();
                break;
        }
        return super.onOptionsItemSelected(item);

    }
Compile and run the app; you will see android options menu appear in the Android toolbar with menu items. When you tap on any of those menu items an android toast message appears on the screen. The source code for options menu tutorial is available on Github
Step 2, file should be styles.xml not string.xml
And it is not working!
Hi, thanks for pointing that out! It’s fixed 🙂
Do you see any errors in the logcat?
Not working. Icons not appearing!