
Last Updated on February 6, 2018
Welcome to another tutorial of codingDemos, in this tutorial i’ll show you how to make android button clickable to start new page.
Note: If you prefer to watch instead of reading the tutorial, you are welcome to watch it at this link: Android button tutorial
Le’t get started!!
- Open up Android Studio and click on (Start a new Android Studio project)
- In this next page you will need to provide the following info about your application:
- Application name: This is the name of the actual application that will show up below the app icon in your phone
- Company name: This will be your company domain name in reverse format as shown in figure (1).
- If you don’t have one you can use an example.com for testing, but when you are about to officially launch your app you will need to have a domain name.
- Project location: This will show you where this project will be saved in your computer.

Figure (1): Package name for Facebook app in Google Play store
- In the (Target Android device) page you are asked to choose which platform you want to develop, in this tutorial will check the box that says (Phone and tablet) and then we choose the minimum SDK that our app will support. Will choose API 16.
Note: If you want to target minimum SDK based on the number of usage, you can check out Android version distribution
- Next page will be (Add an activity to mobile), here it will show you different types of activity that you want to start with but for this tutorial will choose (Empty activity).
- Finally will be (Customize the activity) page where you will be able to change the activity name and the layout file.
- Activity name is the java class and you will be writing java codes, while the layout file is an XML file and is where you will be working with UI part of the app.
- Then click finish and wait for Android Studio to create the project.
Project loading complete 🙂
- Once loading is complete, Android Studio will show you 2 files: (MainActivity.java) & (activity_main.xml)
- Now open up (activity_main.xml) and you will notice a textview with (Hello World), remove that textview and add a button instead like this:
<Button
android:id="@+id/button"
android:layout_width="wrap_content"
android:layout_height="wrap_content"/>
- Now that we have added the button, we can give it a label (Hello world) like this:
android:text="Hello World"
- Next we want to arrange the button to be positioned at the top and center of the screen this:
android:layout_alignParentTop="true"
android:layout_centerHorizontal="true"
- The code for the button view will look something like this:
<Button
android:id="@+id/button"
android:layout_width="wrap_content"
android:layout_height="wrap_content"
android:layout_alignParentTop="true"
android:layout_centerHorizontal="true"
android:text="@string/hello_world" />
- Now open (MainActivity.java) class and we need to declare the button like this:
Button mButton = (Button) findViewById(R.id.button);
Note: In order to look for an ID of a view inside the layout file we need to call this method provided by Android called (findViewById), then we pass the ID of the view by first starting with (R) as resource, ID and then the actual ID of the view.
- Great now we have added a button in activity_main.xml file and we have declared that in (MainActivity.java). Next we need to make android button clickable so that when the user taps on the button the user will be send to another page like this:
mButton.setOnClickListener(new View.OnClickListener() {
            @Override
            public void onClick(View view) {

            }
        });
Calling (setOnClickListener) will allow android button clickable and make certain action, in our case will be to send the user to another page. To do that we need to create another activity and layout file that will act as the destination page whenever the user taps on that button.
- Let’s create a new activity by clicking on File –> New –> Activity –> Empty Activity like as shown in the figure below in figure (2).
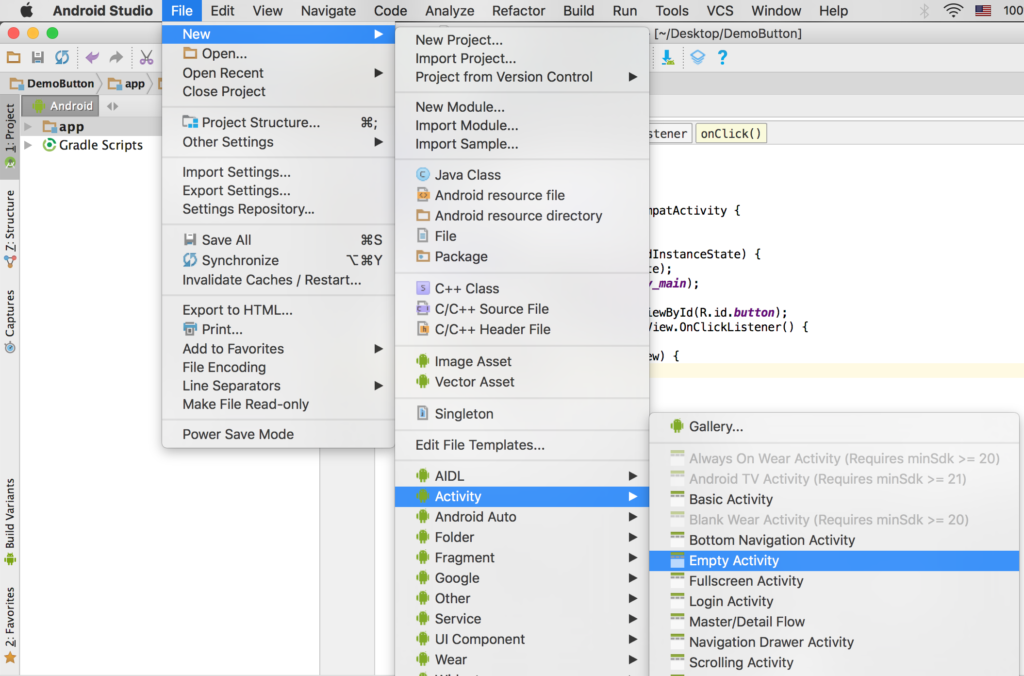
Figure (2): How to create new activity in Android Studio
- Once you click on (Empty Activity) it will show you another page where you need to give a name for the activity and layout file as shown in figure (3).
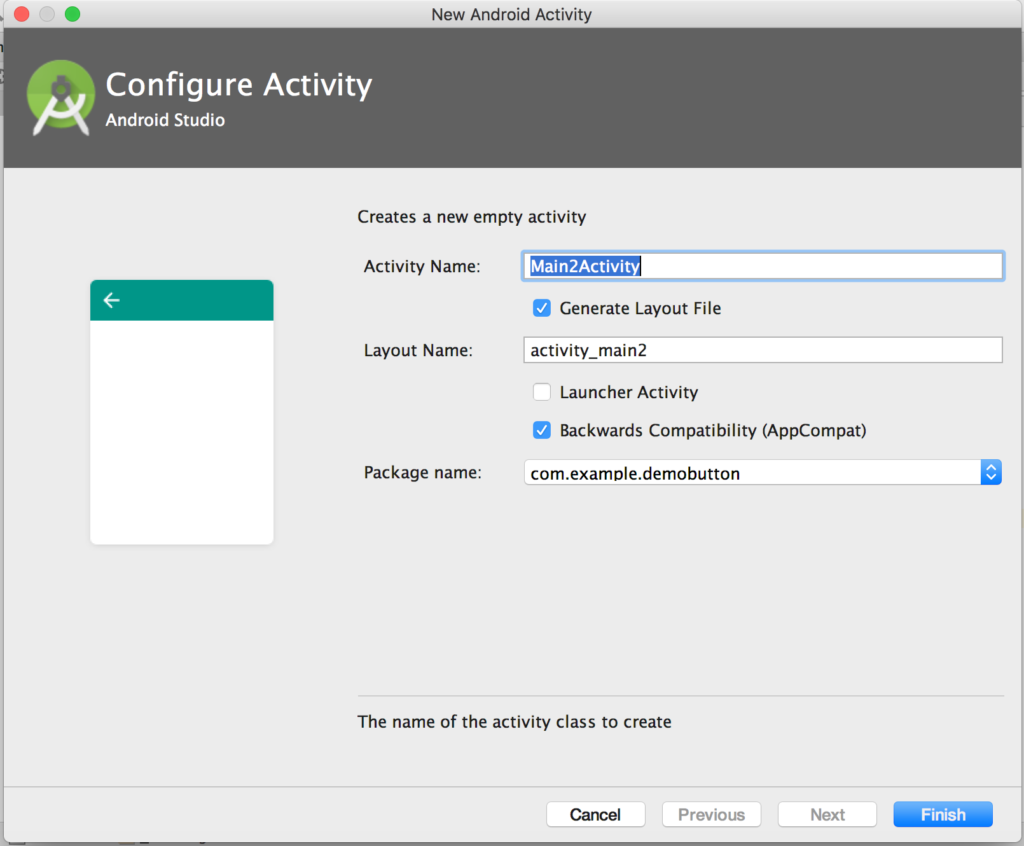
Figure (3): Giving a name for the activity and layout file
- I have named my activity (SecondActivity.java) and my layout file (activity_second.xml). Now let’s open up again (MainActivity.java) class and inside the (setOnClickListener) method we need to send the user who taps on the button to (SecondActivity.java) like this:
startActivity(new Intent(MainActivity.this, SecondActivity.class));
What we did here is we called (startActivity) which takes an (Intent) and inside that we need to specify the current activity (MainActivity.this) as the starting point and (SecondActivity.java) as the destination.
Here is the whole code for (MainActivity.java)
package com.example.demobutton;

import android.content.Intent;
import android.os.Bundle;
import android.support.v7.app.AppCompatActivity;
import android.view.View;
import android.widget.Button;

public class MainActivity extends AppCompatActivity {

    @Override
    protected void onCreate(Bundle savedInstanceState) {
        super.onCreate(savedInstanceState);
        setContentView(R.layout.activity_main);

        Button mButton = (Button) findViewById(R.id.button);
        mButton.setOnClickListener(new View.OnClickListener() {
            @Override
            public void onClick(View view) {
                startActivity(new Intent(MainActivity.this, SecondActivity.class));
            }
        });
    }
}
- Now we will add another button in (activity_second.xml) like what we did previously as shown below:
<?xml version="1.0" encoding="utf-8"?>
<RelativeLayout xmlns:android="http://schemas.android.com/apk/res/android"
xmlns:tools="http://schemas.android.com/tools"
android:layout_width="match_parent"
android:layout_height="match_parent"
android:paddingBottom="@dimen/activity_vertical_margin"
android:paddingLeft="@dimen/activity_horizontal_margin"
android:paddingRight="@dimen/activity_horizontal_margin"
android:paddingTop="@dimen/activity_vertical_margin"
tools:context="com.example.demobutton.SecondActivity">

    <Button
android:id="@+id/button2"
android:layout_width="wrap_content"
android:layout_height="wrap_content"
android:layout_alignParentTop="true"
android:layout_centerHorizontal="true"
android:text="Hello world 2" />
</RelativeLayout>
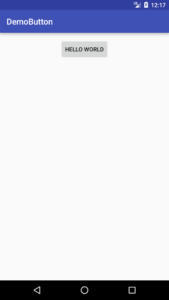 Figure (4): Final output
So when the user taps on the button from (MainActivity.java) will be send to (SecondActivity.java) class where you can see the other button named (Hello World 2).
That’s it we are done for this tutorial 😀
- The source code for this tutorial is available on this link: https://github.com/codingdemos/DemoButton
- For more cool video please check out the YouTube channel on this link: https://www.youtube.com/c/CodingDemos