
Last Updated on November 11, 2018
Hi and welcome to another tutorial from Codingdemos, in this Android CardView example you will learn how to use Android CardView with Recyclerview and Gridlayout. You will build an Android app that show pictures of flowers and their names, when you tap on any picture you will move to a detail page that shows you the flower picture, name and the details.
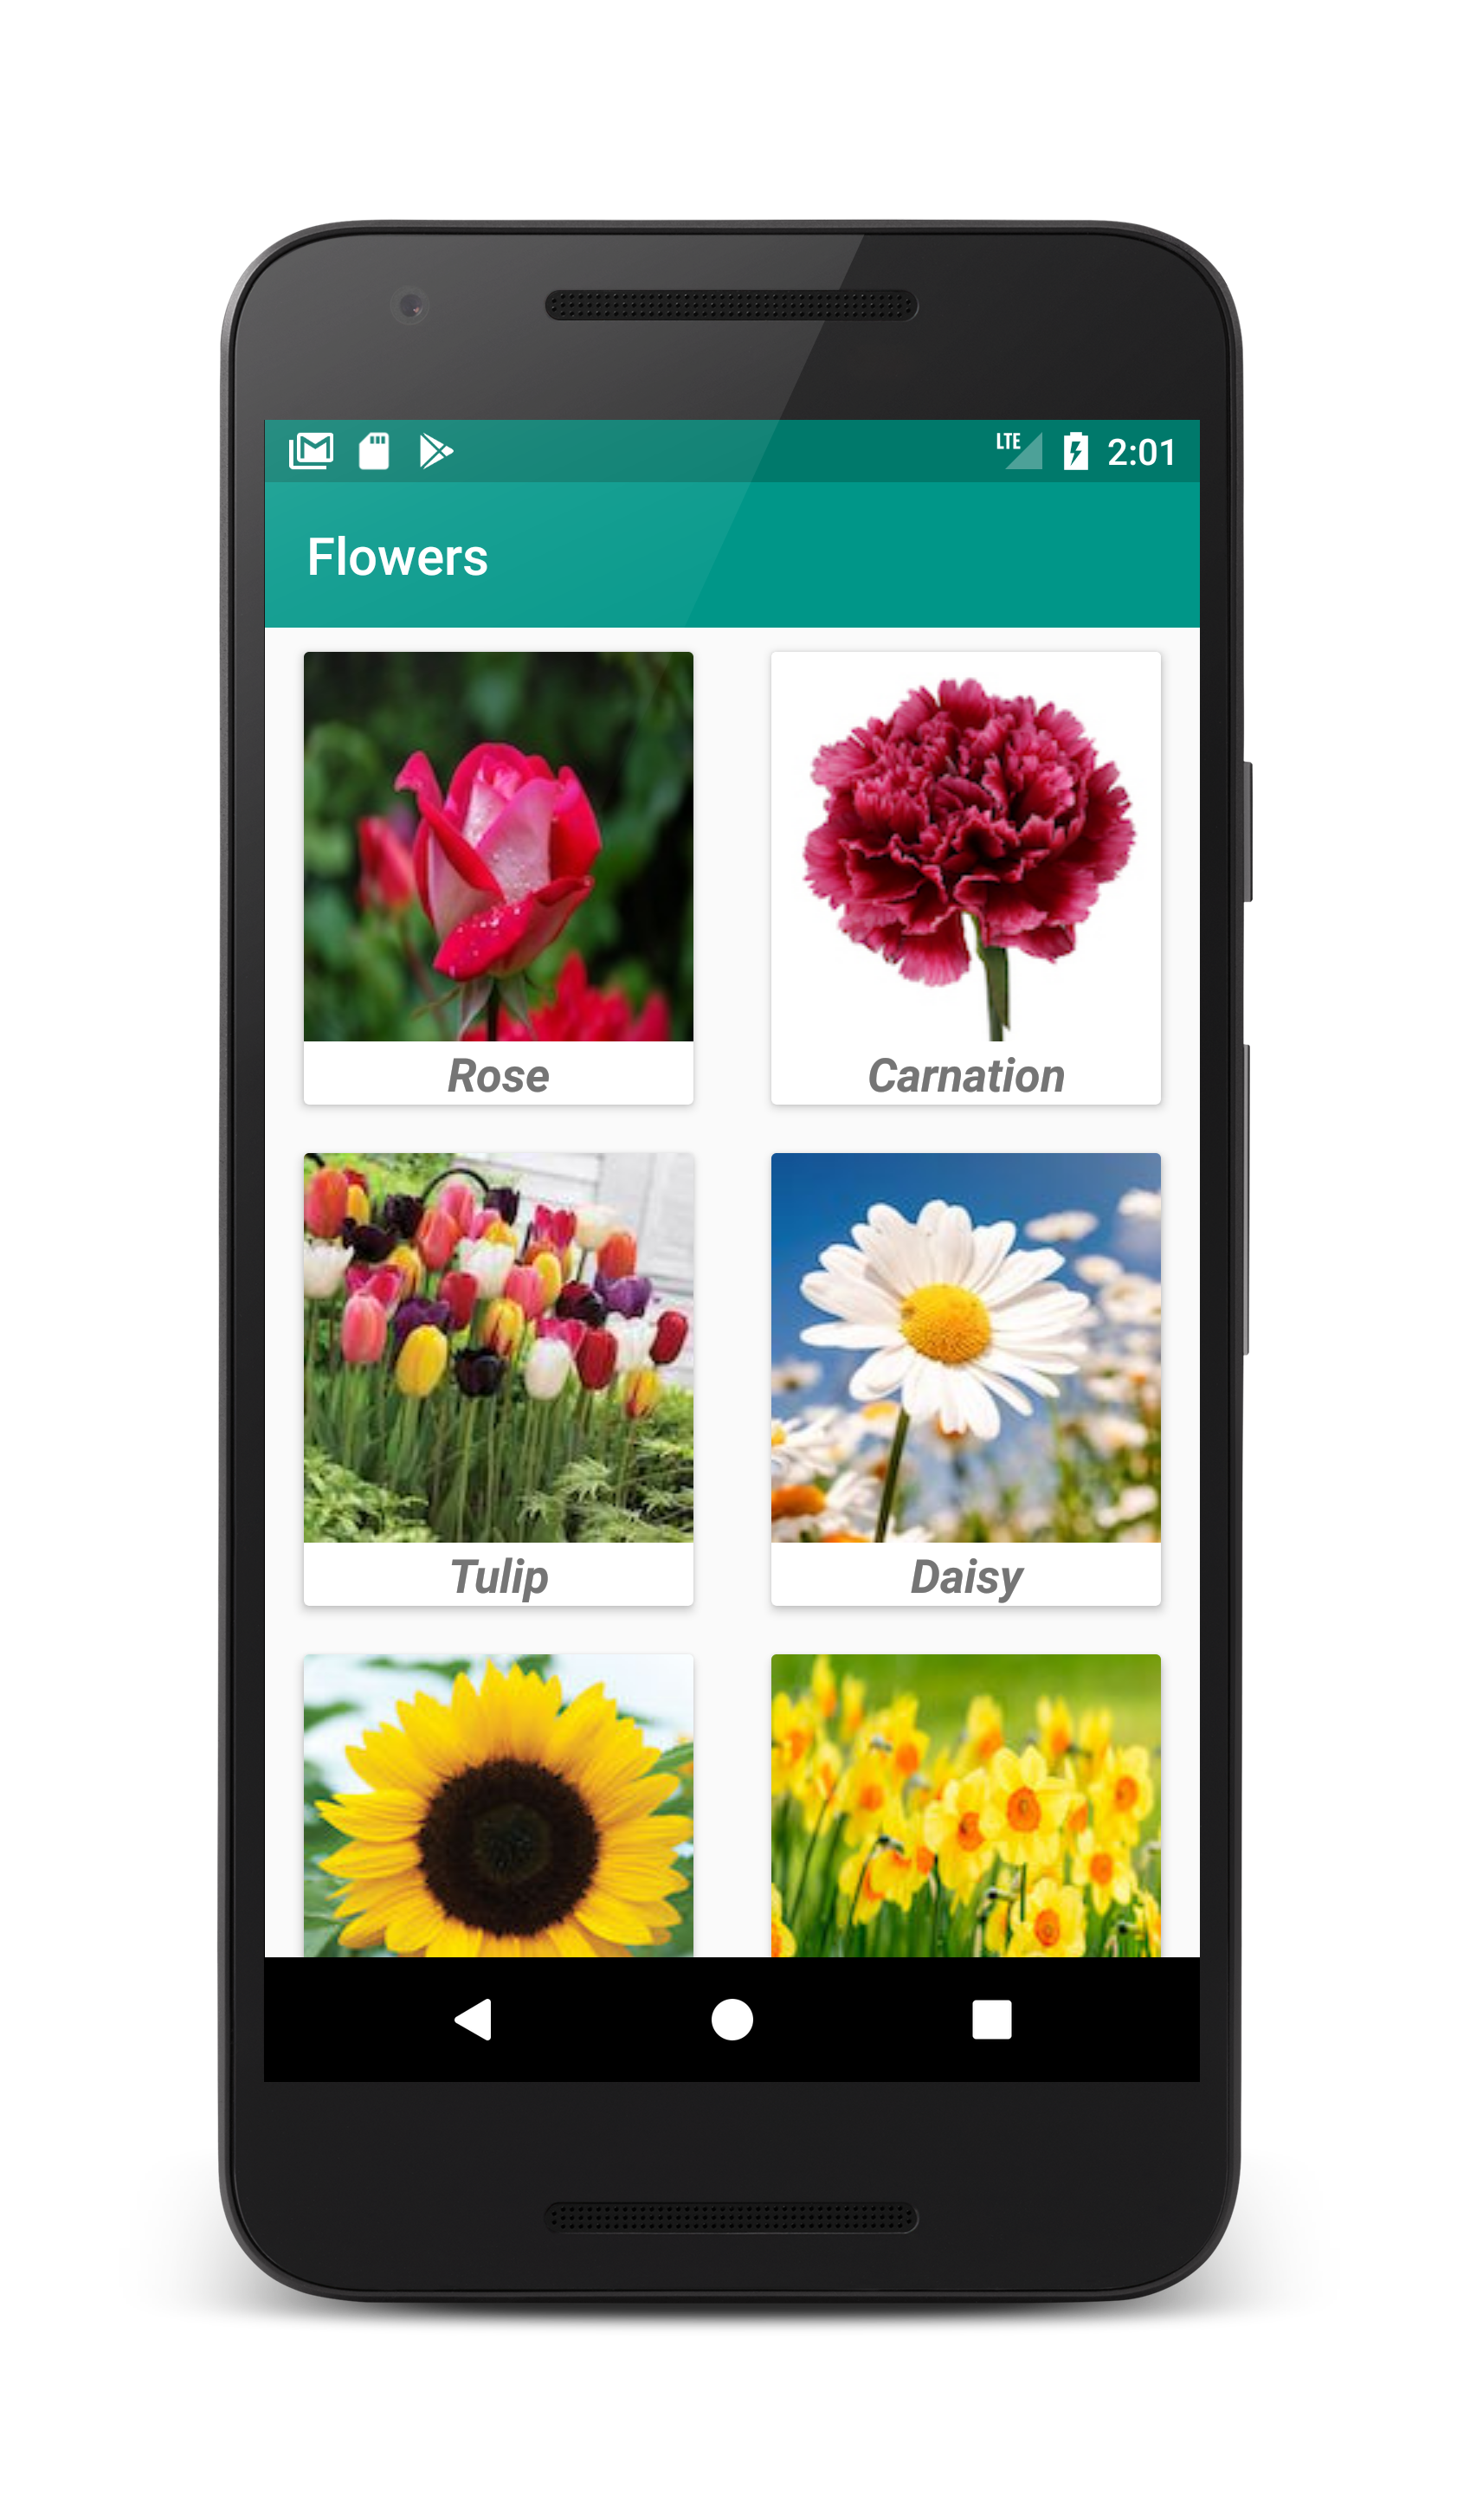
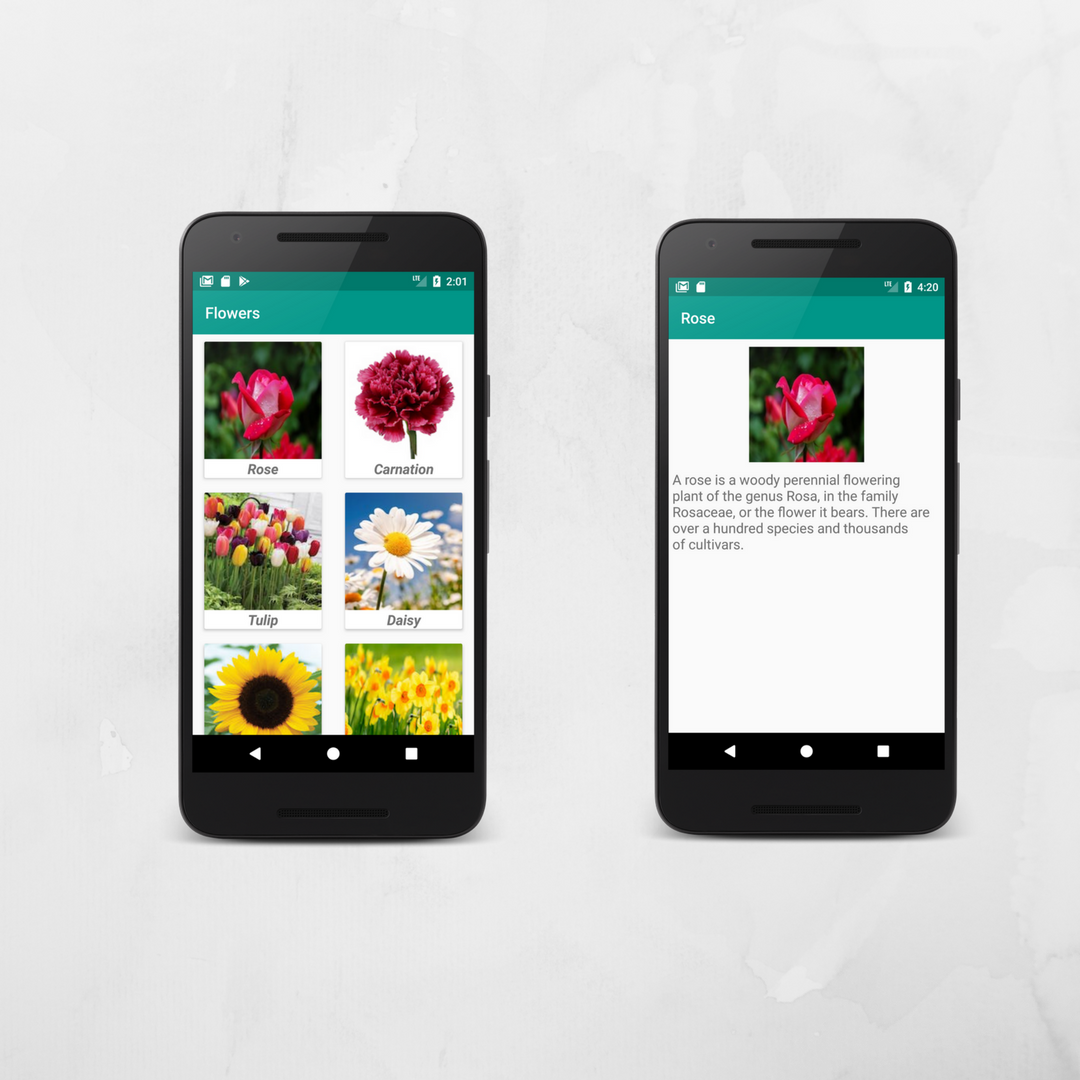
By the end of this tutorial, you will have an app that looks like this. (Large preview)
Note: If you are new to Android Recyclerview or Gridlayout, be sure to check out the following tutorials right here:
– Android Recyclerview example
– Android Gridlayout example
In this tutorial we will be using the following:
-
– Android studio version 3.0
– Android emulator Nexus 5 with API 26
– Minimum SDK API 16
1- Open up Android Studio and create a new project and give it a name, in our case we’ve named it (Flowers), choose API 16 as the minimum SDK, then choose a blank activity, click “Finish” and wait for Android Studio to build your project.

Create new Android Studio project. (Large preview)
2- Open up build.gradle (Module:app) and add Android Recyclerview and CardView dependencies.
implementation 'com.android.support:recyclerview-v7:26.1.0'
implementation 'com.android.support:cardview-v7:26.1.0'
3- Open up colors.xml file to change the main colors of the app.
  < color name="colorPrimary">#009688< /color>
  < color name="colorPrimaryDark">#00796B< /color>
  < color name="colorAccent">#FFC107< /color>
4- Open up styles.xml file and change the parent theme so that you can use Android Toolbar.
< style name="AppTheme" parent="Theme.AppCompat.Light.NoActionBar">
5- Open up activity_main.xml file to add Android Toolbar and Recyclerview.
< android.support.v7.widget.Toolbar
    android:id="@+id/toolbar"
    android:layout_width="match_parent"
    android:layout_height="wrap_content"
    android:background="?attr/colorPrimary"
    android:minHeight="?attr/actionBarSize"
    android:theme="?attr/actionBarTheme"
    app:popupTheme="@style/ThemeOverlay.AppCompat.Light"
    app:theme="@style/ThemeOverlay.AppCompat.Dark" />

  < android.support.v7.widget.RecyclerView
    android:id="@+id/recyclerview"
    android:layout_width="match_parent"
    android:layout_height="wrap_content"
    android:scrollbars="vertical" />
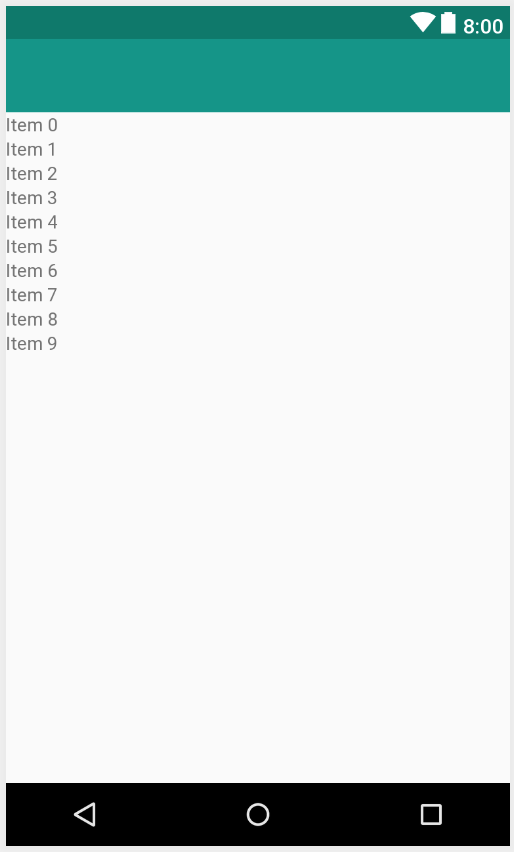
Android Toolbar with Recyclerview. (Large preview)
6- Make sure to add the images that you want them to appear in Gridlayout inside project drawable folder.
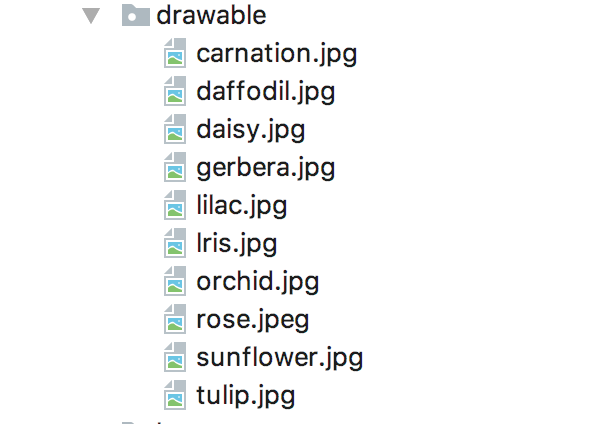
Images inside Android Studio drawable folder. (Large preview)
7- Create a new resource file and name it (recyclerview_item_row), inside this file you add Android CardView, LinearLayout, ImageView and TextView.
8- First you will need to add Android CardView.
< android.support.v7.widget.CardView
    android:id="@+id/cardview"
    android:layout_width="wrap_content"
    android:layout_height="wrap_content"
    android:layout_gravity="center"
    app:cardElevation="3dp"
    android:layout_margin="4dp"
    app:cardUseCompatPadding="true"/>
– CardElevation is used to provide shadow that surround the CardView.
– CardUseCompatPadding is used to provide padding to Lollipop and later platforms.
9- Inside Android CardView you will need to add Android LinearLayout.
< android.support.v7.widget.CardView
    android:id="@+id/cardview"
    android:layout_width="wrap_content"
    android:layout_height="wrap_content"
    android:layout_gravity="center"
    app:cardElevation="3dp"
    android:layout_margin="4dp"
    app:cardUseCompatPadding="true">
< LinearLayout
      android:layout_width="match_parent"
      android:layout_height="match_parent"
      android:orientation="vertical">

    < /LinearLayout>
< /android.support.v7.widget.CardView>
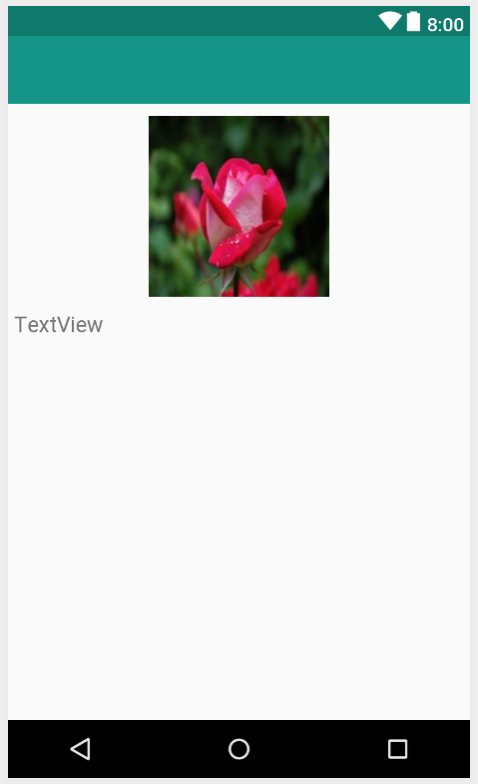
10- Now you need to add Android ImageView and TextView inside that Android LinearLayout.
< ImageView
        android:id="@+id/ivImage"
        android:layout_width="wrap_content"
        android:layout_height="wrap_content"
        android:src="@drawable/rose" />

< TextView
        android:id="@+id/tvTitle"
        android:layout_width="match_parent"
        android:layout_height="wrap_content"
        android:text="TextView" />

Android CardView Example TextView without style. (Large preview)
11- Change the appearance of TextView (tvTitle) by increasing text size, make it center and change the style to italic and bold.
< TextView
        android:id="@+id/tvTitle"
        android:layout_width="match_parent"
        android:layout_height="wrap_content"
        android:gravity="center"
        android:text="TextView"
        android:textSize="18sp"
        android:textStyle="italic|bold" />
12- Here is the full code for recyclerview_row_item.xml.
< LinearLayout xmlns:android="http://schemas.android.com/apk/res/android"
  xmlns:app="http://schemas.android.com/apk/res-auto"
  android:layout_width="match_parent"
  android:layout_height="wrap_content"
  android:orientation="vertical">

  < android.support.v7.widget.CardView
    android:id="@+id/cardview"
    android:layout_width="wrap_content"
    android:layout_height="wrap_content"
    android:layout_gravity="center"
    app:cardElevation="3dp"
    android:layout_margin="4dp"
    app:cardUseCompatPadding="true">

    < LinearLayout
      android:layout_width="match_parent"
      android:layout_height="match_parent"
      android:orientation="vertical">

      < ImageView
        android:id="@+id/ivImage"
        android:layout_width="wrap_content"
        android:layout_height="wrap_content"
        android:src="@drawable/rose" />

      < TextView
        android:id="@+id/tvTitle"
        android:layout_width="match_parent"
        android:layout_height="wrap_content"
        android:gravity="center"
        android:text="TextView"
        android:textSize="18sp"
        android:textStyle="italic|bold" />
    < /LinearLayout>
  < /android.support.v7.widget.CardView>
< /LinearLayout>
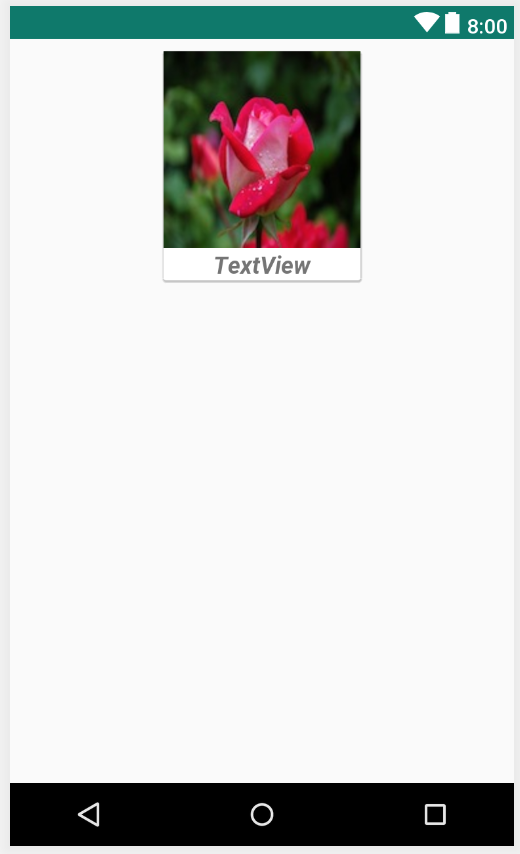
Android CardView Example TextView with style. (Large preview)
13- Create a new class and name it FlowerData, this class will be used to assign values to the Recyclerview.
public class FlowerData {

    private String flowerName;
    private String flowerDescription;
    private int flowerImage;

    public FlowerData(String flowerName, String flowerDescription, int flowerImage) {
        this.flowerName = flowerName;
        this.flowerDescription = flowerDescription;
        this.flowerImage = flowerImage;
    }

    public String getFlowerName() {
        return flowerName;
    }

    public String getFlowerDescription() {
        return flowerDescription;
    }

    public int getFlowerImage() {
        return flowerImage;
    }
}
14- Create a new java class and name it (MyAdapter) and make it extends RecyclerView.Adapter. Make sure to implement Recyclerview required methods (onCreateViewHolder(), onBindViewHolder(), and getItemCount()), based on the error that you see below FlowerViewHolder you need to create a new class called (FlowerViewHolder).
15- Inside FlowerViewHolder class and based on the error you will need to add a default constructor.
public FlowerViewHolder(View itemView) {
        super(itemView);
    }
16- Declare 2 variables and a constructor inside MyAdapter.java, this constructor will be used to pass data from MainActivity.java to this adapter.
private Context mContext;
private List< FlowerData > mFlowerList;

    MyAdapter(Context mContext, List< FlowerData > mFlowerList) {
        this.mContext = mContext;
        this.mFlowerList = mFlowerList;
    }
17- This is the full code for MyAdapter.java class.
public class MyAdapter extends RecyclerView.Adapter< FlowerViewHolder > {

    private Context mContext;
    private List< FlowerData > mFlowerList;

    MyAdapter(Context mContext, List< FlowerData > mFlowerList) {
        this.mContext = mContext;
        this.mFlowerList = mFlowerList;
    }

    @Override
    public FlowerViewHolder onCreateViewHolder(ViewGroup parent, int viewType) {
        return null;
    }

    @Override
    public void onBindViewHolder(FlowerViewHolder holder, int position) {

    }

    @Override
    public int getItemCount() {
        return 0;
    }
}

class FlowerViewHolder extends RecyclerView.ViewHolder {


    FlowerViewHolder(View itemView) {
        super(itemView);
    }
}
18- Inside Recyclerview (onCreateViewHolder) method you need to inflate the custom layout file recyclerview_row_item.xml.
View mView = LayoutInflater.from(parent.getContext()).inflate(R.layout.recyclerview_row_item, parent, false);
return new FlowerViewHolder(mView);
19- Inside the constructor of FlowerViewHolder class you need to declare and initialize Android ImageView (ivPlace) and TextView (tvTitle).
FlowerViewHolder(View itemView) {
        super(itemView);

        ImageView mImage = itemView.findViewById(R.id.ivImage);
        TextView mTitle = itemView.findViewById(R.id.tvTitle);
    }
20- Inside (onBindViewHolder) is where you will initialize (ivPlace) and (tvTitle).
holder.mImage.setImageResource(mFlowerList.get(position).getFlowerImage());
holder.mTitle.setText(mFlowerList.get(position).getFlowerName());
21- Change the return value inside (getItemCount()) to actually return the size of the (mFlowerList) instead of null value.
@Override
    public int getItemCount() {
        return mFlowerList.size();
    }
22- Here is the final code for MyAdapter.java.
public class MyAdapter extends RecyclerView.Adapter< FlowerViewHolder > {

    private Context mContext;
    private List< FlowerData > mFlowerList;

    MyAdapter(Context mContext, List< FlowerData > mFlowerList) {
        this.mContext = mContext;
        this.mFlowerList = mFlowerList;
    }

    @Override
    public FlowerViewHolder onCreateViewHolder(ViewGroup parent, int viewType) {
        View mView = LayoutInflater.from(parent.getContext()).inflate(R.layout.recyclerview_row_item, parent, false);
        return new FlowerViewHolder(mView);
    }

    @Override
    public void onBindViewHolder(final FlowerViewHolder holder, int position) {
        holder.mImage.setImageResource(mFlowerList.get(position).getFlowerImage());
        holder.mTitle.setText(mFlowerList.get(position).getFlowerName());
    }

    @Override
    public int getItemCount() {
        return mFlowerList.size();
    }
}

class FlowerViewHolder extends RecyclerView.ViewHolder {

    ImageView mImage;
    TextView mTitle;

    FlowerViewHolder(View itemView) {
        super(itemView);

        mImage = itemView.findViewById(R.id.ivImage);
        mTitle = itemView.findViewById(R.id.tvTitle);
    }
}
23- Now you are done working with MyAdapter.java, next you need to open up MainActivity.java to declare and initialize Android Toolbar, Recyclerview and the actual data to be displayed in Android Gridlayout.
24- Initialize Android Toolbar and make sure to set the title of the app to appear inside it.
Toolbar mToolbar = findViewById(R.id.toolbar);
mToolbar.setTitle(getResources().getString(R.string.app_name));
25- Initialize Android Recyclerview and GridlayoutManager.
Recyclerview mRecyclerView = findViewById(R.id.recyclerview);
GridLayoutManager mGridLayoutManager = new GridLayoutManager(MainActivity.this, 2);
mRecyclerView.setLayoutManager(mGridLayoutManager);
26- Initialize the actual data that will appear inside Android Gridlayout.
List< FlowerData > mFlowerList = new ArrayList<>();
        mFlowerData = new FlowerData("Rose", getString(R.string.description_flower_rose),
                R.drawable.rose);
        mFlowerList.add(mFlowerData);
        mFlowerData = new FlowerData("Carnation", getString(R.string.description_flower_carnation),
                R.drawable.carnation);
        mFlowerList.add(mFlowerData);
        mFlowerData = new FlowerData("Tulip", getString(R.string.description_flower_tulip),
                R.drawable.tulip);
        mFlowerList.add(mFlowerData);
        mFlowerData = new FlowerData("Daisy", getString(R.string.description_flower_daisy),
                R.drawable.daisy);
        mFlowerList.add(mFlowerData);
        mFlowerData = new FlowerData("Sunflower", getString(R.string.description_flower_sunflower),
                R.drawable.sunflower);
        mFlowerList.add(mFlowerData);
        mFlowerData = new FlowerData("Daffodil", getString(R.string.description_flower_daffodil),
                R.drawable.daffodil);
        mFlowerList.add(mFlowerData);
        mFlowerData = new FlowerData("Gerbera", getString(R.string.description_flower_gerbera),
                R.drawable.gerbera);
        mFlowerList.add(mFlowerData);
        mFlowerData = new FlowerData("Orchid", getString(R.string.description_flower_orchid),
                R.drawable.orchid);
        mFlowerList.add(mFlowerData);
        mFlowerData = new FlowerData("Iris", getString(R.string.description_flower_iris),
                R.drawable.lris);
        mFlowerList.add(mFlowerData);
        mFlowerData = new FlowerData("Lilac", getString(R.string.description_flower_lilac),
                R.drawable.lilac);
        mFlowerList.add(mFlowerData);
Note: The long description of each flower is added inside strings.xml while the string titles are being used instead like as shown in the code snippet above.
< resources>
  < string name="app_name">Flowers< /string>
  < string name="description_flower_rose">A rose is a woody perennial flowering plant of the genus Rosa, in the family Rosaceae, or the flower it bears. There are over a hundred species and thousands of cultivars.< /string>
  < string name="description_flower_carnation">Dianthus caryophyllus, the carnation or clove pink, is a species of Dianthus. It is probably native to the Mediterranean region but its exact range is unknown due to extensive cultivation for the last 2,000 years.< /string>
  < string name="description_flower_tulip">Tulips form a genus of spring-blooming perennial herbaceous bulbiferous geophytes. The flowers are usually large, showy and brightly coloured, generally red yellow or white.< /string>
  < string name="description_flower_daisy">Bellis perennis is a common European species of daisy, of the Asteraceae family, often considered the archetypal species of that name.< /string>
  < string name="description_flower_sunflower">Helianthus or sunflower L. is a genus of plants comprising about 70 species in the family Asteraceae. The genus is one of many in the Asteraceae that are known as sunflowers.< /string>
  < string name="description_flower_daffodil">Narcissus is a genus of predominantly spring perennial plants in the Amaryllidaceae family. Various common names including daffodil, daffadowndilly, narcissus, and jonquil are used to describe all or some members of the genus.< /string>
  < string name="description_flower_gerbera">Gerbera L. is a genus of plants in the Asteraceae. It was named in honour of German botanist and medical doctor Traugott Gerber | who travelled extensively in Russia and was a friend of Carl Linnaeus.< /string>
  < string name="description_flower_orchid">The Orchidaceae are a diverse and widespread family of flowering plants, with blooms that are often colourful and fragrant, commonly known as the orchid family. Along with the Asteraceae, they are one of the two largest families of flowering plants.< /string>
  < string name="description_flower_iris">Irises are perennial plants, growing from creeping rhizomes (rhizomatous irises) or, in drier climates, from bulbs (bulbous irises). They have long, erect flowering stems which may be simple or branched, solid or hollow, and flattened or have a circular cross-section.< /string>
  < string name="description_flower_lilac">Syringa is a genus of 12 currently recognized species of flowering woody plants in the olive family, native to woodland and scrub from southeastern Europe to eastern Asia, and widely and commonly cultivated in temperate areas elsewhere.< /string>
< /resources>
27- Finally you need to declare and initialize (MyAdapter) and make sure to use this adapter with Android Recyclerview.
MyAdapter myAdapter = new MyAdapter(MainActivity.this, mFlowerList);
mRecyclerView.setAdapter(myAdapter);
28- The full code for MainActivity.java file.
public class MainActivity extends AppCompatActivity {

    Toolbar mToolbar;
    RecyclerView mRecyclerView;
    List< FlowerData > mFlowerList;
    FlowerData mFlowerData;

    @Override
    protected void onCreate(Bundle savedInstanceState) {
        super.onCreate(savedInstanceState);
        setContentView(R.layout.activity_main);

        mToolbar = findViewById(R.id.toolbar);
        mToolbar.setTitle(getResources().getString(R.string.app_name));
        mRecyclerView = findViewById(R.id.recyclerview);
        GridLayoutManager mGridLayoutManager = new GridLayoutManager(MainActivity.this, 2);
        mRecyclerView.setLayoutManager(mGridLayoutManager);

        mFlowerList = new ArrayList<>();
        mFlowerData = new FlowerData("Rose", getString(R.string.description_flower_rose),
                R.drawable.rose);
        mFlowerList.add(mFlowerData);
        mFlowerData = new FlowerData("Carnation", getString(R.string.description_flower_carnation),
                R.drawable.carnation);
        mFlowerList.add(mFlowerData);
        mFlowerData = new FlowerData("Tulip", getString(R.string.description_flower_tulip),
                R.drawable.tulip);
        mFlowerList.add(mFlowerData);
        mFlowerData = new FlowerData("Daisy", getString(R.string.description_flower_daisy),
                R.drawable.daisy);
        mFlowerList.add(mFlowerData);
        mFlowerData = new FlowerData("Sunflower", getString(R.string.description_flower_sunflower),
                R.drawable.sunflower);
        mFlowerList.add(mFlowerData);
        mFlowerData = new FlowerData("Daffodil", getString(R.string.description_flower_daffodil),
                R.drawable.daffodil);
        mFlowerList.add(mFlowerData);
        mFlowerData = new FlowerData("Gerbera", getString(R.string.description_flower_gerbera),
                R.drawable.gerbera);
        mFlowerList.add(mFlowerData);
        mFlowerData = new FlowerData("Orchid", getString(R.string.description_flower_orchid),
                R.drawable.orchid);
        mFlowerList.add(mFlowerData);
        mFlowerData = new FlowerData("Iris", getString(R.string.description_flower_iris),
                R.drawable.lris);
        mFlowerList.add(mFlowerData);
        mFlowerData = new FlowerData("Lilac", getString(R.string.description_flower_lilac),
                R.drawable.lilac);
        mFlowerList.add(mFlowerData);

        MyAdapter myAdapter = new MyAdapter(MainActivity.this, mFlowerList);
        mRecyclerView.setAdapter(myAdapter);
    }
}
29- Now you can build and run the app to see the progress in the emulator.
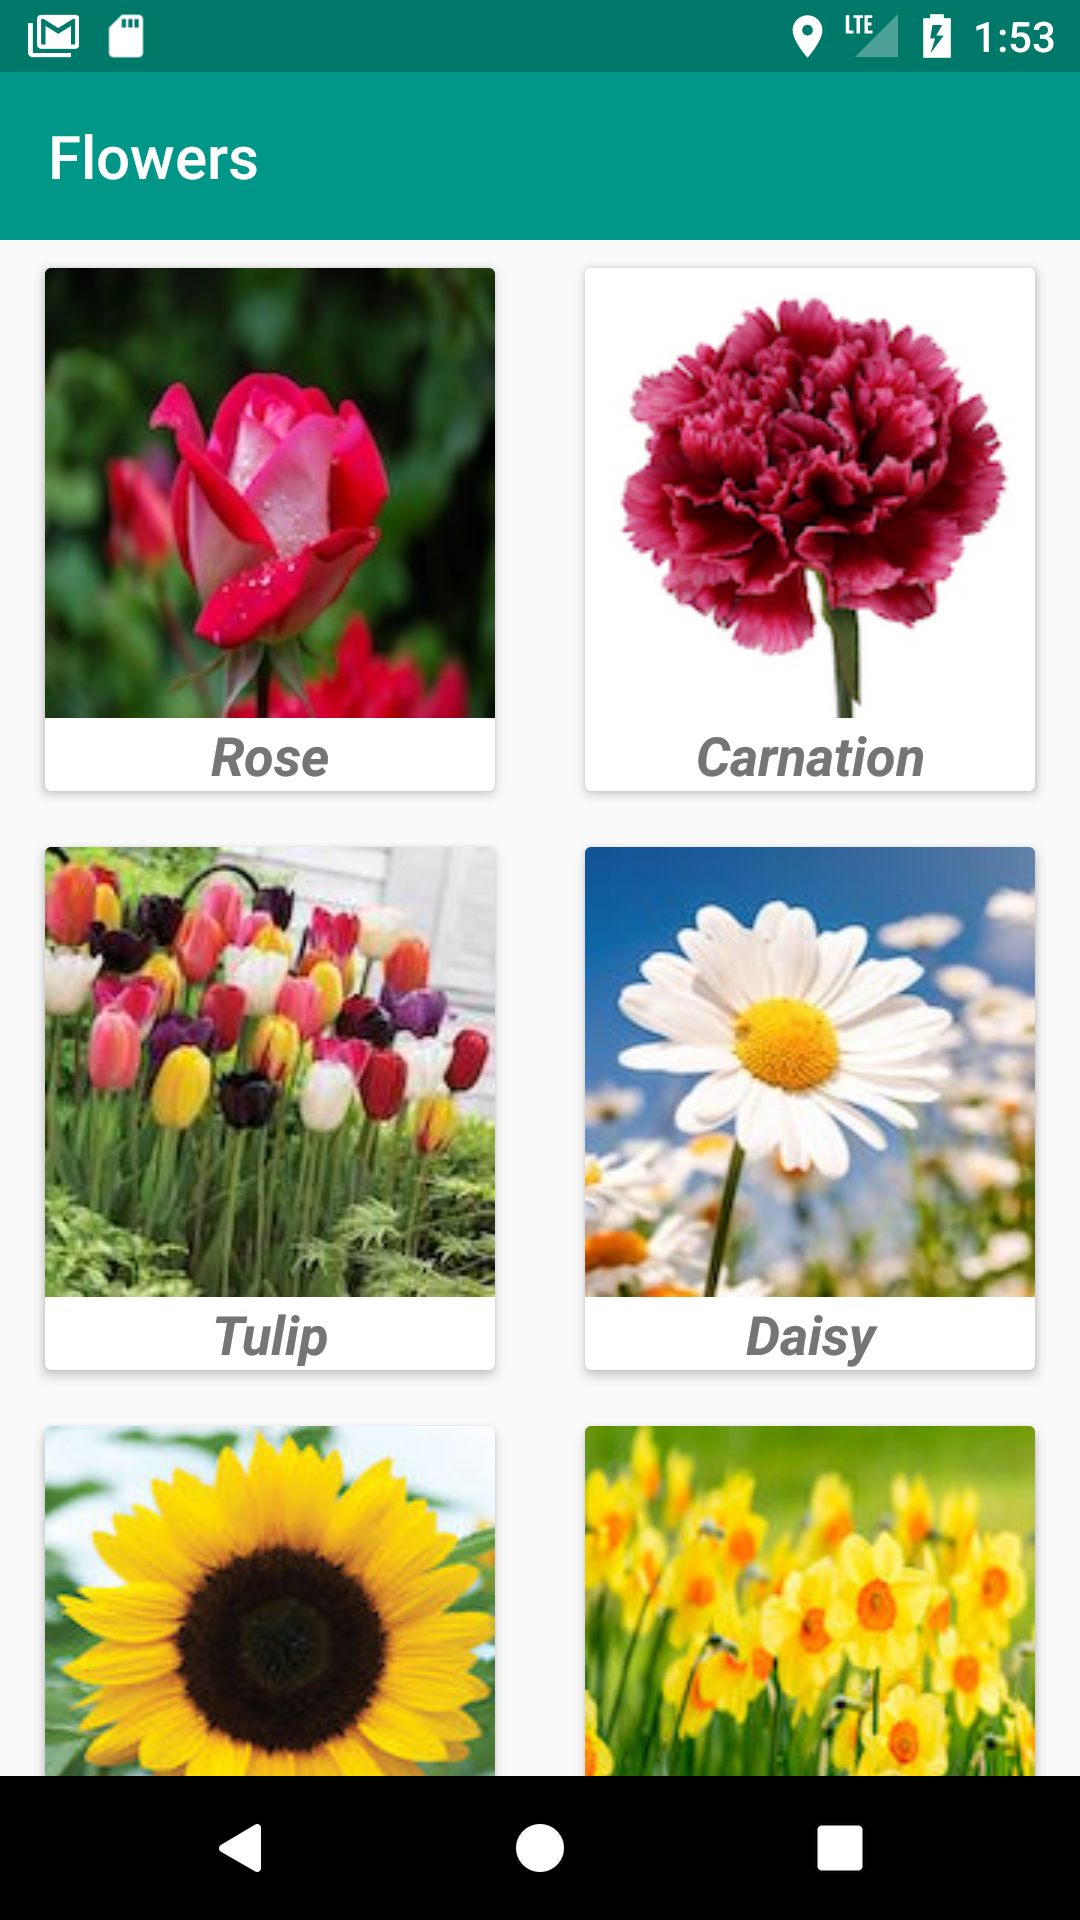
Android CardView Example With Gridlayout. (Large preview)
30- Great now you can see Gridlayout filled with pictures and their titles, next you want to add the click function so that when you tap on any of those images, you will move to another page which shows you the picture and a description.
31- Create a new Android empty Activity and name it (DetailActivity).
32- Open up MyAdapter.java class, inside FlowerViewHolder you need to initialize Android CardView.
CardView mCardView = itemView.findViewById(R.id.cardview);
33- Inside (onBindViewHolder) you can make CardView clickable by using setOnClickListener.
holder.mCardView.setOnClickListener(new View.OnClickListener() {
            @Override
            public void onClick(View view) {

            }
        });
34- Inside onClick method, use Android Intent to pass the image, title and description to DetailActivity.java class.
Intent mIntent = new Intent(mContext, DetailActivity.class);
                mIntent.putExtra("Title", mFlowerList.get(holder.getAdapterPosition()).getFlowerName());
                mIntent.putExtra("Description", mFlowerList.get(holder.getAdapterPosition()).getFlowerDescription());
                mIntent.putExtra("Image", mFlowerList.get(holder.getAdapterPosition()).getFlowerImage());
                mContext.startActivity(mIntent);
35- Open up activity_detail.xml file and add Android Toolbar, ImageView and TextView.
< android.support.v7.widget.Toolbar
    android:id="@+id/toolbar"
    android:layout_width="match_parent"
    android:layout_height="wrap_content"
    android:background="?attr/colorPrimary"
    android:minHeight="?attr/actionBarSize"
    android:theme="?attr/actionBarTheme"
    app:popupTheme="@style/ThemeOverlay.AppCompat.Light"
    app:theme="@style/ThemeOverlay.AppCompat.Dark" />

  < ImageView
    android:id="@+id/ivImage"
    android:layout_width="wrap_content"
    android:layout_height="wrap_content"
    android:layout_gravity="center"
    android:layout_marginTop="10dp"
    android:src="@drawable/rose" />

  < TextView
    android:id="@+id/tvDescription"
    android:layout_width="match_parent"
    android:layout_height="wrap_content"
    android:layout_marginTop="5dp"
    android:padding="5dp"
    android:text="TextView"
    android:textSize="18sp" />
activity_detail.xml : Android Toolbar, ImageView and TextView. (Large preview)
36- Open up DetailActivity.java file, declare and initialize Android Toolbar, ImageView, TextView and Bundle.
Toolbar mToolbar = findViewById(R.id.toolbar);
ImageView mFlower = findViewById(R.id.ivImage);
TextView mDescription = findViewById(R.id.tvDescription);

        Bundle mBundle = getIntent().getExtras();
        if (mBundle != null) {
            mToolbar.setTitle(mBundle.getString("Title"));
            mFlower.setImageResource(mBundle.getInt("Image"));
            mDescription.setText(mBundle.getString("Description"));
        }
37- Here is the full code for DetailActivity.java file.
public class DetailActivity extends AppCompatActivity {

    Toolbar mToolbar;
    ImageView mFlower;
    TextView mDescription;

    @Override
    protected void onCreate(Bundle savedInstanceState) {
        super.onCreate(savedInstanceState);
        setContentView(R.layout.activity_detail);

        mToolbar = findViewById(R.id.toolbar);
        mFlower = findViewById(R.id.ivImage);
        mDescription = findViewById(R.id.tvDescription);

        Bundle mBundle = getIntent().getExtras();
        if (mBundle != null) {
            mToolbar.setTitle(mBundle.getString("Title"));
            mFlower.setImageResource(mBundle.getInt("Image"));
            mDescription.setText(mBundle.getString("Description"));
        }
    }
}
Android CardView Example with Gridlayout. (Large preview)
38- The app is complete, now build and run the app and you will see the same result as shown above. The source code for this tutorial is available on GitHub, I hope you find this tutorial helpful and if you have any question please post them in the comment below.
hi thanks master:
I learned all of them and also ı add toolbar back icon and many features.
so, I want to show random page but here is our flowerdata and it contains text and image but I learned only text switcher. how can we display these pages as a random when clickinng a button on detailed page?
hi
could I display random page when our recycleview apps?
I want to put a floatbutton on my detailactivity.javaclass and when I click it must display a page with my string data and image files.
mFlowerData = new FlowerData(“Rose”, getString(R.string.description_flower_rose),
R.drawable.rose);
mFlowerList.add(mFlowerData);
mFlowerData = new FlowerData(“Carnation”, getString(R.string.description_flower_carnation),
R.drawable.carnation);
how can ı do it I want to display it my last page.
Hi, that’s is great 🙂
First you need to create multiple activities, then you will need to use Random method in order to start a new activity randomly once you tap on floating action button.
Now if you want to pass the flower data to another page, you will need to use Intent method.
do you know any lesson for me on youtube or elsewhere? How can I study ?
Here is a link to a solution: https://stackoverflow.com/questions/12101292/how-can-i-display-random-activity-when-click-button
hi codingdemos
is ist possible to adding third item in the list? I want to try adding mp3( R.raw.audio) file but ı couldnt. how could I add?
Hi, yeah you can add another item.
– Open FlowerData.java class and declare the forth item that you want to add.
– Open MainActivity.java and initialize the forth item with the audio file that you have in (raw) folder:
mFlowerData = new FlowerData(“Carnation”, getString(R.string.description_flower_carnation),
R.drawable.carnation, R.raw.audio);
mFlowerList.add(mFlowerData);
i got this error please help me
class my adapter must either be declared abstract or implement abstract method onBindViewHolder
@Override
public void onBindViewHolder(final BoardViewHolder holder, int position) {
holder.mImage.setImageResource(mBoardList.get(position).getFlowerImage());
holder.mTitle.setText(mBoardList.get(position).getBoardName());
}
Hi Ramesh, please make sure the class definition includes the name of ViewHolder like this:
public class MyAdapter extends RecyclerView.Adapter BoardViewHolder.getFlowerImage() is not working still.
Hi, please make sure to declare mFlowerList variable like this:
private List< FlowerData > mFlowerList
You do it like this to be able to reference those methods inside FlowerData.java class
I hope that helps 🙂
Hi, I’m trying to integrate your project to mine and I have a problem about recycler view. My cards appearance vertical not side by side. What should I do to get a list like yours ?
Hi Mustafa, please make sure that you are using GridLayout with Recyclerview like this:
GridLayoutManager mGridLayoutManager = new GridLayoutManager(MainActivity.this, 2);
mRecyclerView.setLayoutManager(mGridLayoutManager);
I am getting an error in myadapter.java. The Error is the getFLowerName() ,getFlowerImage() methods showing an error as can’t be resolved.. I checked so many times but I can’t fix this error. So Please resolve this error
My email:Keerthan095.1@gmail.com
Hi, please make sure to declare mFlowerList variable like this:
private List< FlowerData > mFlowerList
You do it like this to be able to reference getFLowerName() and getFlowerImage() methods inside FlowerData.java class
I hope that helps 🙂
hi, i got an error
cannot resolve methods in ………
public void onBindViewHolder(final FlowerViewHolder holder, int position) {
holder.mImage.setImageResource(mFlowerList.get(position).getFlowerImage());
holder.mTitle.setText(mFlowerList.get(position).getFlowerName());
}
Hi, you see that error under which part?
@Override
public FlowerViewHolder onCreateViewHolder(ViewGroup parent, int viewType) {
CardView mCardView = itemView.findViewById(R.id.cardview);
View mView = LayoutInflater.from(parent.getContext()).inflate(R.layout.recyclerview_item_row, parent, false);
return new FlowerViewHolder(mView);
}
Iam getting an error in this code ,which is located in myadapter.java..
CardView mCardView = itemView.findViewById(R.id.cardview);
iam getting an errror in itemView . giving error as cannot resolve symbol ‘itemView’, please help me to fix it.
Hi,
You don’t reference a view inside (onCreateView), instead you should do it inside a ViewHolder class like what i’m doing with (FlowerViewHolder).
Please remove this line from (onCreateView) and put it inside a ViewHolder class: CardView mCardView = itemView.findViewById(R.id.cardview);
Once you create a ViewHolder class, you will have access to (itemView of a type View) which you will then use it to reference any views from the layout resource file.
Can you please elaborate this ViewHolder class
Hai,
I have try this code ,which builds successfully but the app is not running in the emulator.
It shows like Appname keeps stopping ,can u resolve this error.Thank you 🙂
Hi, can you please tell me what is the error message that you see in the logcat when the app crashes?
Error inflating class android.support.v7.widget.Toolbar
thank you for such a great lesson. Everything worked perfectly with me before i implement the onclicklistener. when i tried to implement the onclicklistener the app crashed and didn’t open in the emulator. now i want every card view when clicked takes the user to a new different activity. I would also like to implement Interstitial ads when the user clicks on the cardview.
i would really appreciate your help
Hi, In step number (30) is where I showed you how to send the user from one screen to another screen when tapping on cardview.
Can you please tell me what is the error message that you see in the logcat when the app crashes?
Hello thank you for your lesson it worked with me perfectly, but the app crashes when i implement the onclicklistener. I want every card to take the user to a new activity. Your help is highly appreciated.
Hi, I have explained that in step (30). Can you please tell me what is the error message that you see in the logcat when the app crashes?
Amazing….. you helped a lot. God Bless you
hi , I want to also play a video when user click the item .
How to do that?
hi , I want to add a play a video when user click on listItem . How to do that?
Hi CodeAdmin,
Thank You very much for such content it was really useful and im had learnd a lot about listView and RecyclerView.
However, building of this particular practice couse me little problem.
When I run app my cardViews make a big space beetwen each other HORIZONTALLY . No metter how much row i will do vertically they are perfect but not horizotally. Please help!!!
Anyway THANK YOU for this content!
Hi, I’m happy to hear that 🙂
Please check the margin left or margin right for the item inside the cardview. That could be the reason why you see a space between the items.