
Last Updated on March 31, 2019
Hello and welcome to another tutorial from Codingdemos, today will share with you 4 Android developer options that you need to know as an Android developer. Grab a cup of coffee and let’s get started 🙂
Android developer options which you need to know. (Large preview)
What are those 4 Android Developer Options
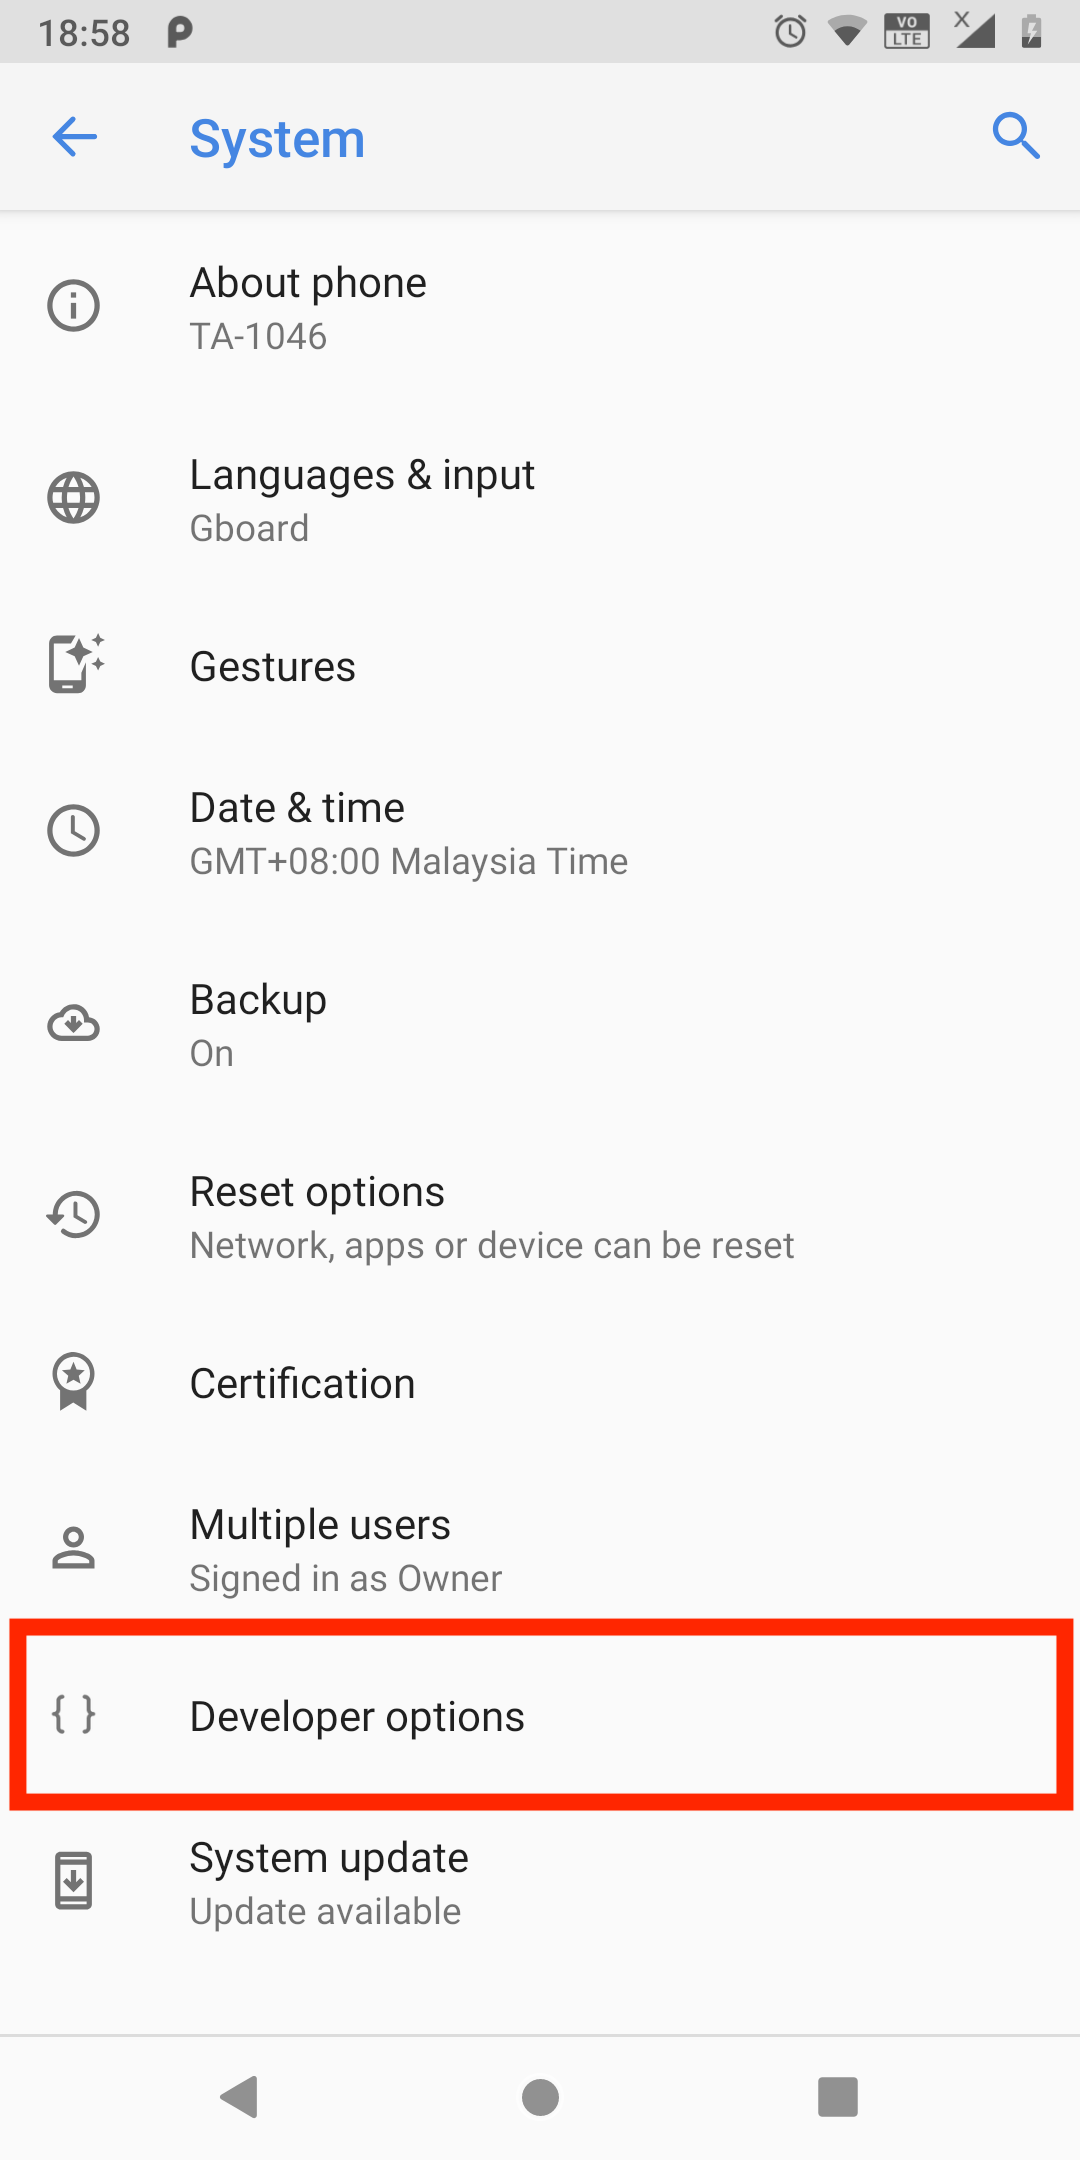
System UI Demo Mode
Developer options system ui demo mode. (Large preview)
It feels good when you reach the stage where you are taking screenshots of your app to upload them on the Play Store listing 🙂
On thing which may bothers you is the appearance of the status bar which might be full of notification icons, this will affect the overall appearance of the screenshot. Fortunately You don’t have to be a photoshop master to fix this because this developer options is here to help.
Inside Developer Options tap on System UI Demo Mode and activate Show demo mode by tapping on the switch.
Developer options system ui demo mode. (Large preview)
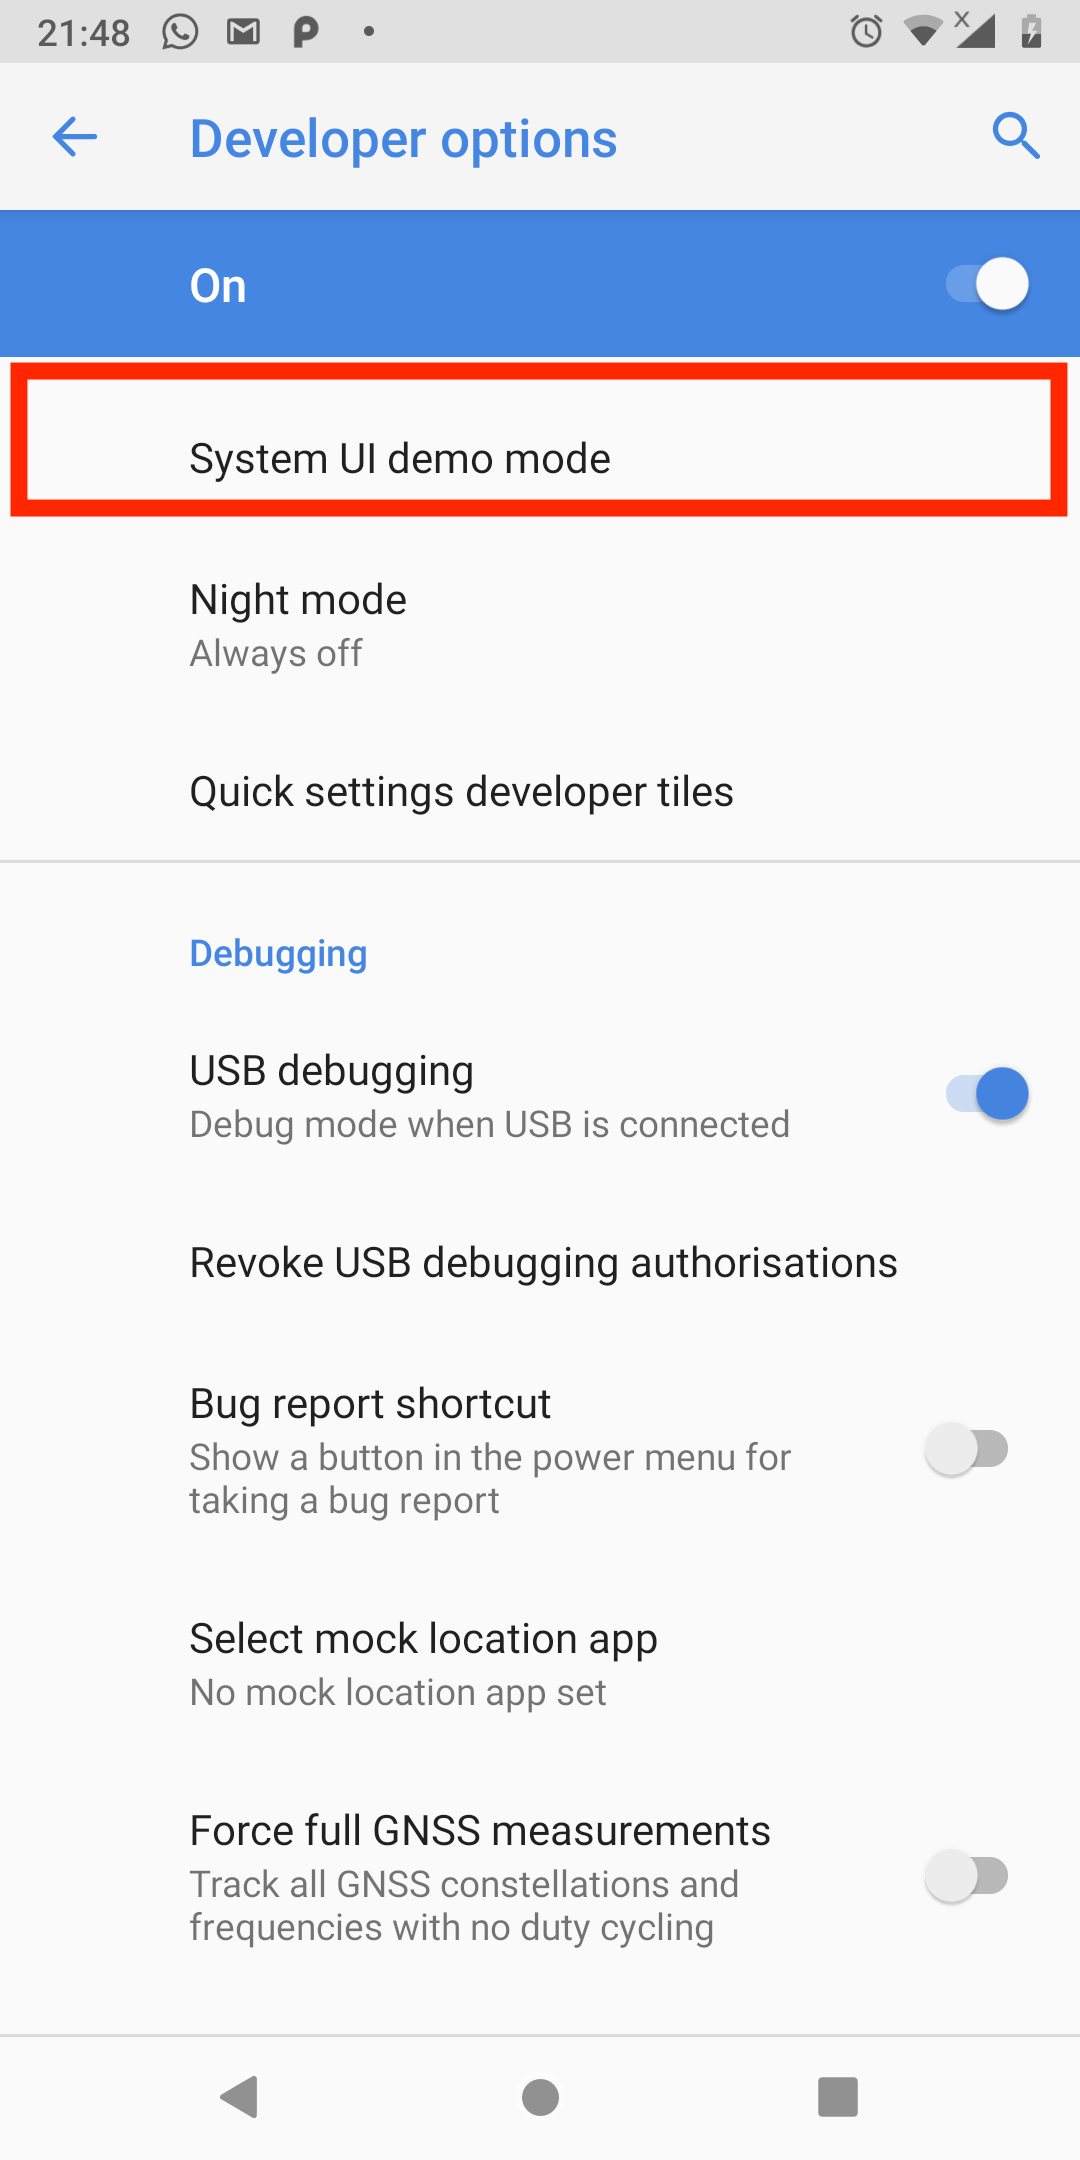
Show Taps
Developer options show taps. (Large preview)
You as an Android developer might be asked to show a demo of a function/feature which you’ve been working on it for a while to the end user. Creating a video demo to showcase the function might not be enough for the user to understand and that’s where this developer option comes to the game.
Show Taps can be use to show a pointer (Circle) on the screen whenever you tap on something or scroll through a list. This will make your video demo interesting because you are actually indicate where you tap on the screen while doing the demo.
This option can be combined together with System UI Demo Mode to make an interesting video demo for your user.
Developer options show taps. (Large preview)
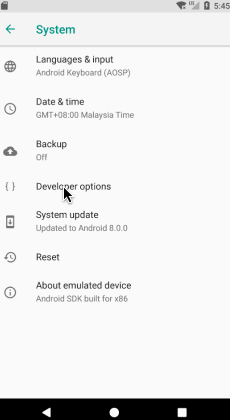
Simulate a Display With a Cutout
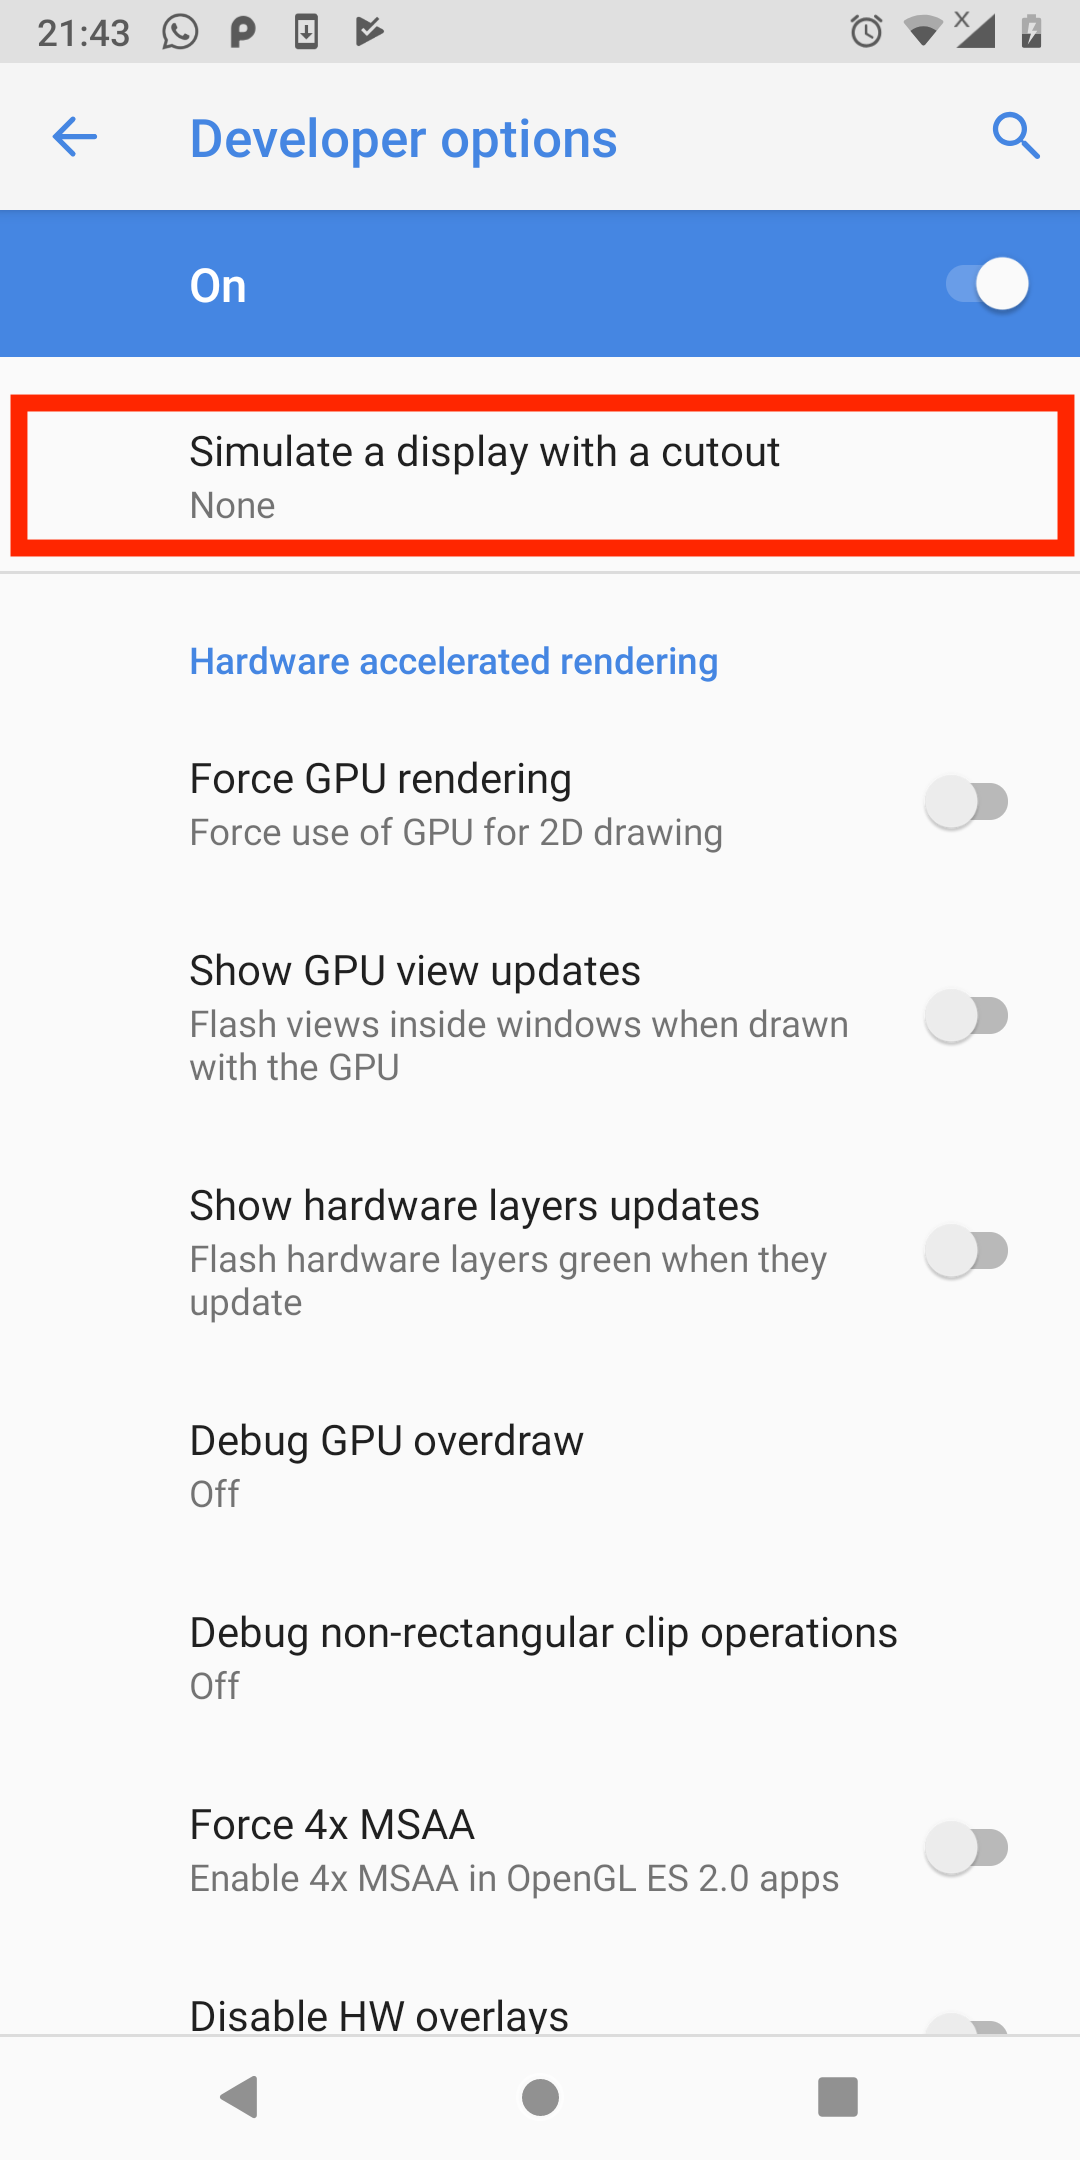
Developer options simulate a display with a cutout. (Large preview)
Ever since Apple released an iPhone with a cutout aka Notch, every phone manufacturer started following their footsteps when releasing a new Android phone. You as a developer need to make sure that your app works on all kind of phones with Notches.
The best part is you don’t have to buy all sort of phones with Notches, because Cutout option is here to do the job.
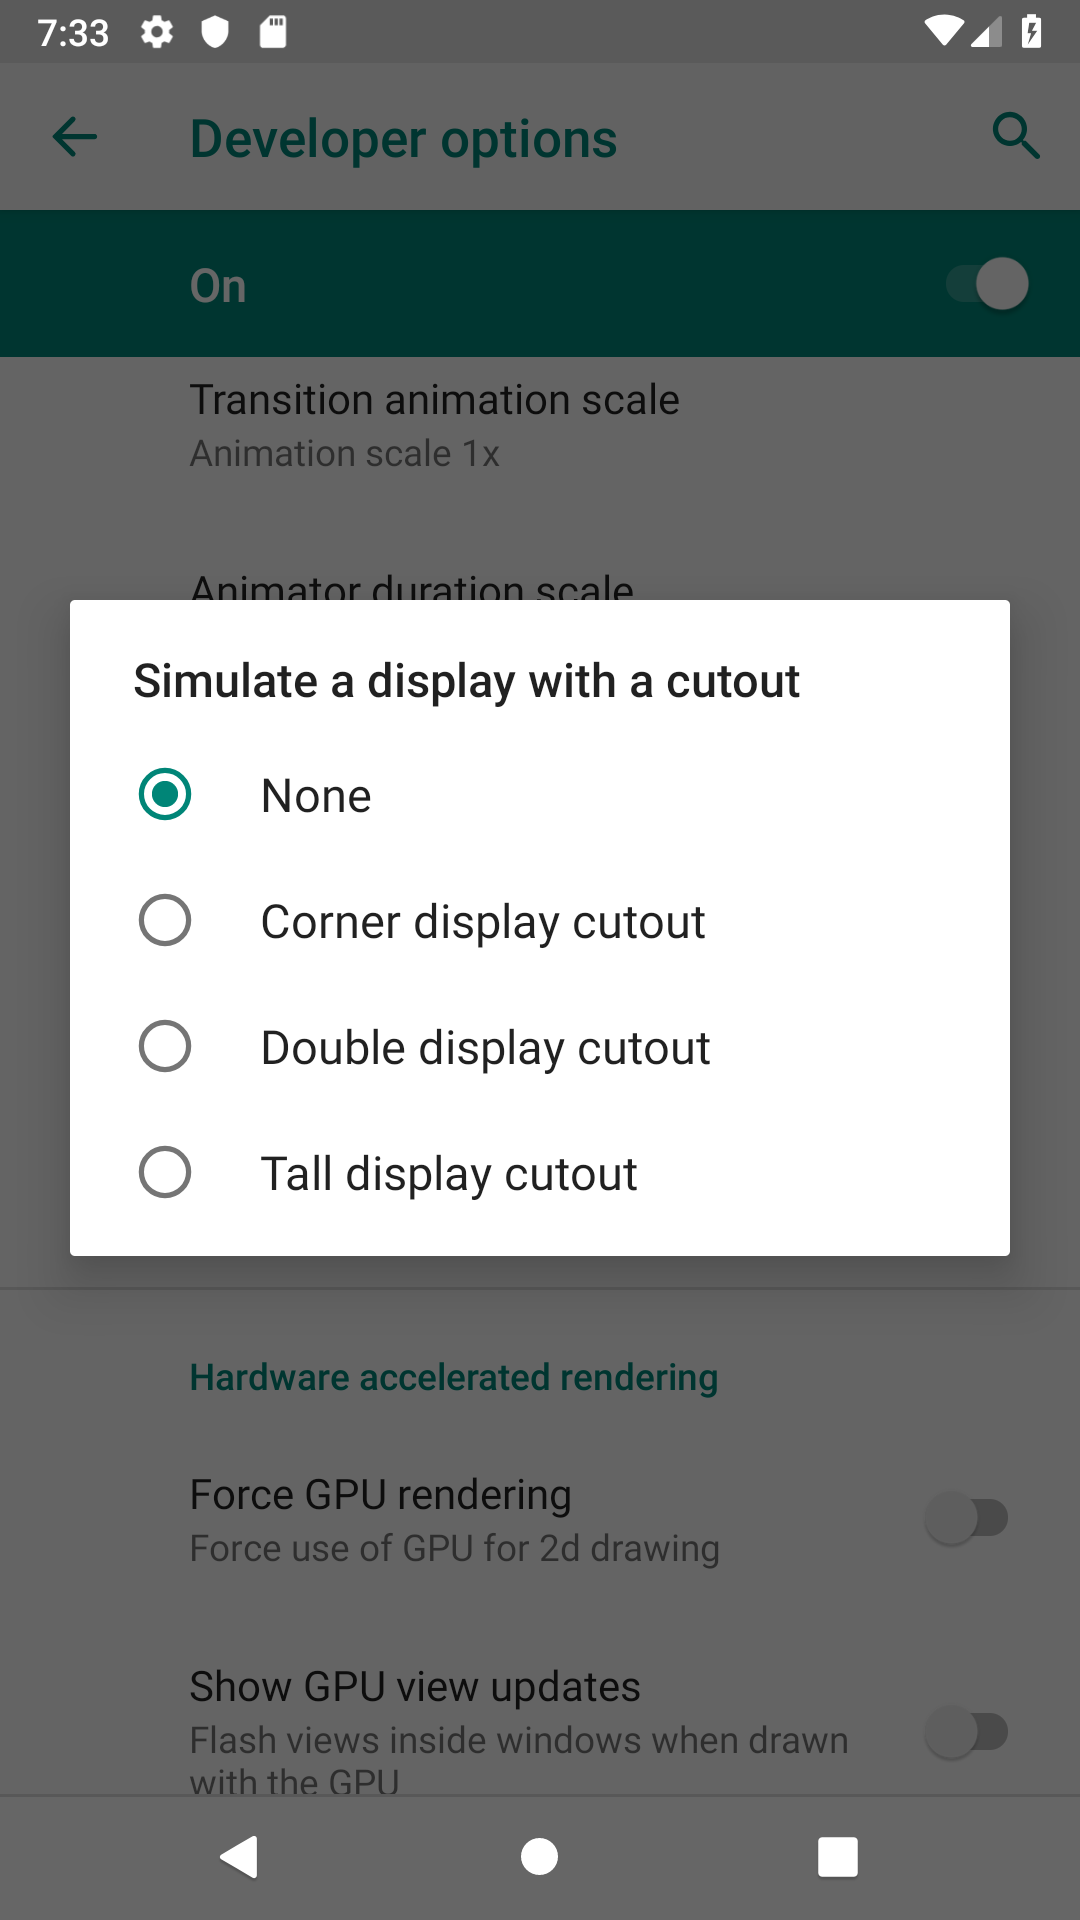
Showing different types of notch display. (Large preview)
Developer options simulate a display with a cutout. (Large preview)
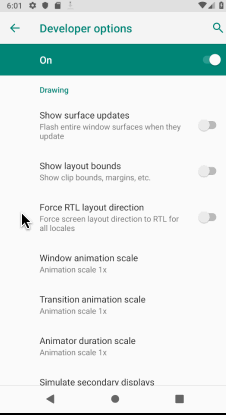
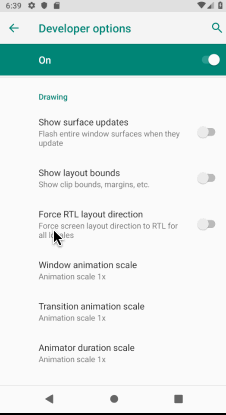
Force RTL layout direction
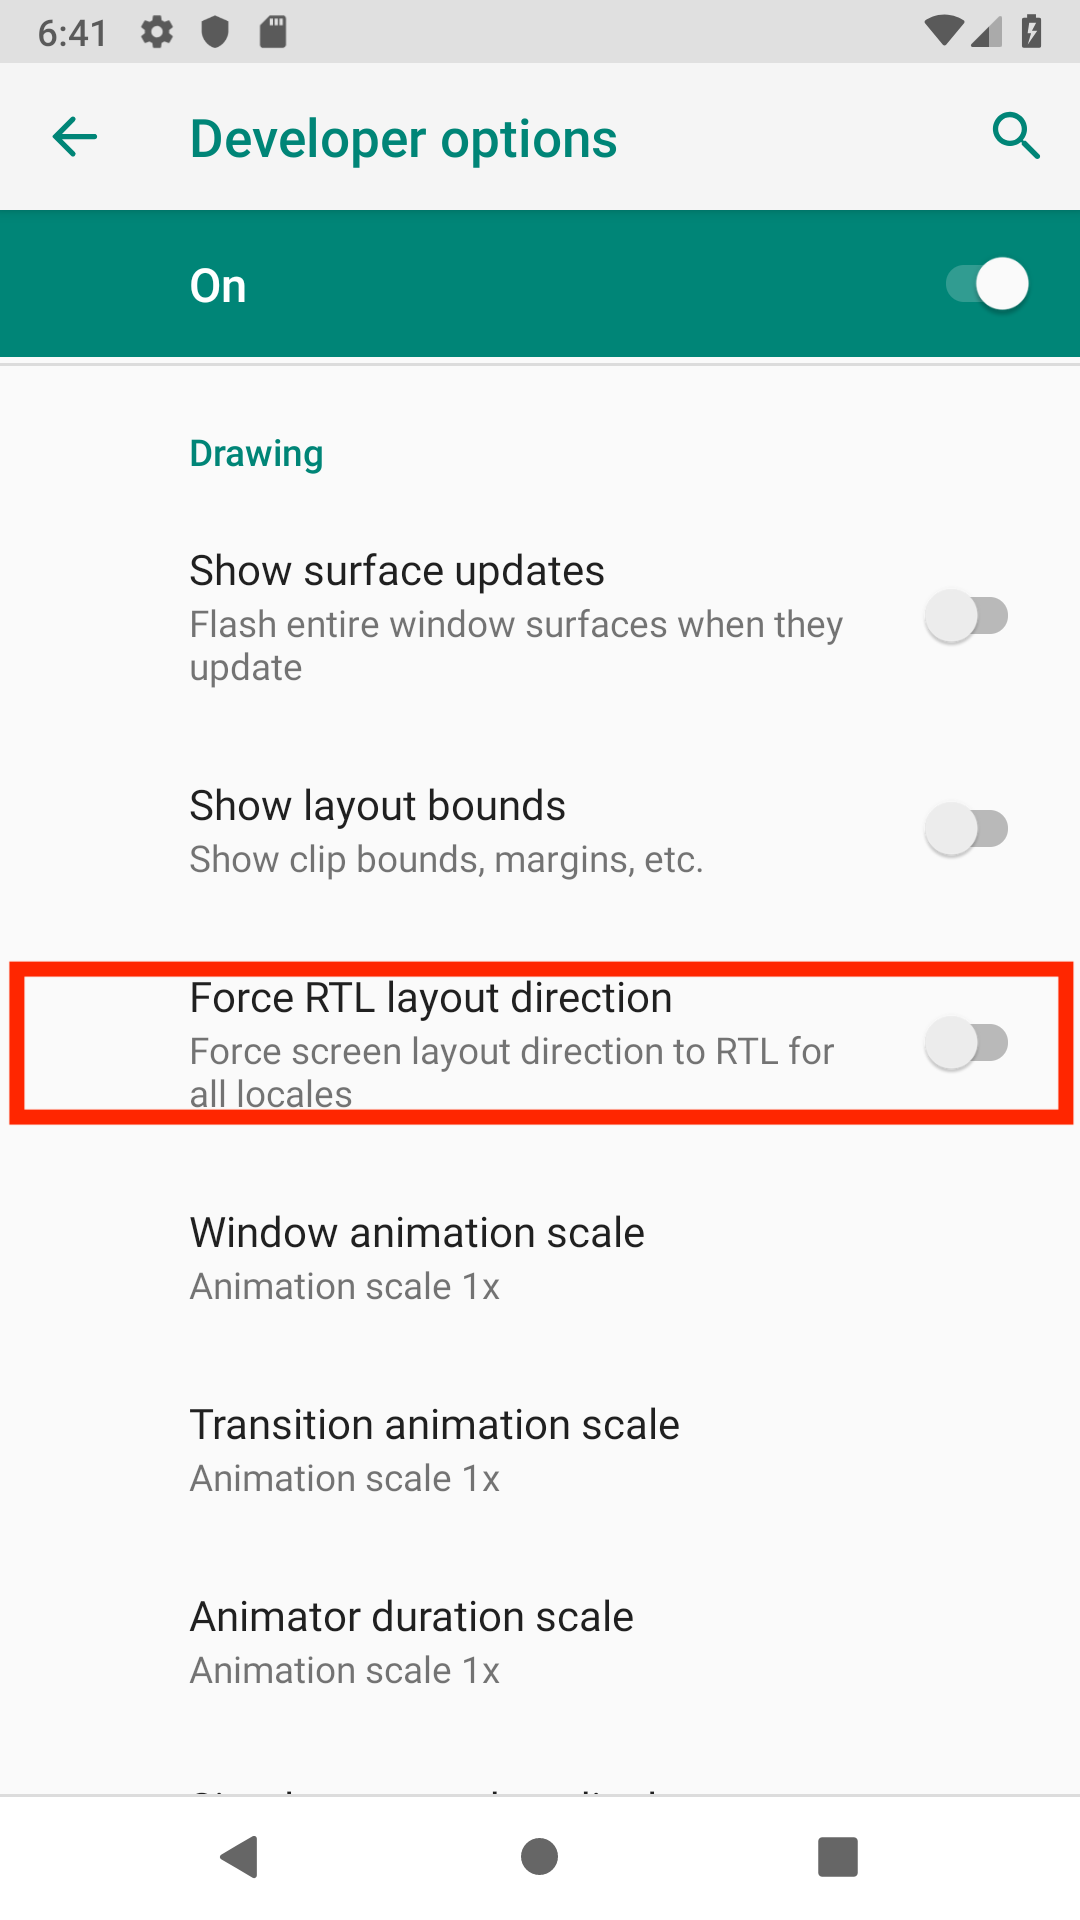
Developer options RTL layout direction. (Large preview)
Building an Android app that support RTL (Right-to-left) can be tricky sometimes. For example your app’s language might be Arabic, Hebrew or Persian, so you need to test the app to make sure that everything is aligned properly and in the correct direction. Android developers options has an option that does that for you.
Developer options simulate a display with a cutout. (Large preview)
I hope you find this tutorial helpful and if you have any question please post them in the comment below.
hey can you help me with this code ?
MainActivity.java
package com.example.mymehnat;
import android.content.Context;
import android.support.annotation.NonNull;
import android.support.design.widget.NavigationView;
import android.support.design.widget.TabLayout;
import android.support.v4.view.GravityCompat;
import android.support.v4.view.ViewPager;
import android.support.v4.widget.DrawerLayout;
import android.support.v7.app.ActionBarDrawerToggle;
import android.support.v7.app.AppCompatActivity;
import android.os.Bundle;
import android.support.v7.widget.Toolbar;
import android.view.Menu;
import android.view.MenuItem;
import android.widget.ArrayAdapter;
import android.widget.ListView;
import android.support.v7.widget.SearchView;
import java.util.ArrayList;
public class MainActivity extends AppCompatActivity implements NavigationView.OnNavigationItemSelectedListener {
private TabLayout tabLayout;
private Toolbar toolbar1;
private ViewPager viewPager;
private DrawerLayout drawer;
private ViewPagerAdapter adapter;
ArrayAdapter arrayAdapter;
public ListView lst;
@Override
protected void onCreate(Bundle savedInstanceState) {
super.onCreate(savedInstanceState);
setContentView(R.layout.activity_main);
Toolbar toolbar1=findViewById(R.id.toolbar1);
setSupportActionBar(toolbar1);
drawer=findViewById(R.id.drawer_layout);
NavigationView navigationView=findViewById(R.id.nav_view);
navigationView.setNavigationItemSelectedListener(this);
ActionBarDrawerToggle toggle=new ActionBarDrawerToggle(this,drawer,toolbar1,R.string.navigation_drawer_open,R.string.navigation_drawer_close);
drawer.addDrawerListener(toggle);
toggle.syncState();
if(savedInstanceState==null){
getSupportFragmentManager().beginTransaction().replace(R.id.fragment_container,new home_fragment()).commit();
navigationView.setCheckedItem(R.id.nav_english);
}
tabLayout=(TabLayout)findViewById(R.id.tablayout);
viewPager=(ViewPager)findViewById(R.id.view_pager);
adapter=new ViewPagerAdapter(getSupportFragmentManager());
adapter.AddFragment(new home_fragment(),”English”);
adapter.AddFragment(new genre_fragment(),”Hindi”);
adapter.AddFragment(new fav_fragment(),”Tags”);
adapter.AddFragment(new fav_fragment(),”Favourites”);
viewPager.setAdapter(adapter);
tabLayout.setupWithViewPager(viewPager);
tabLayout.getTabAt(0).setText(“English”);
tabLayout.getTabAt(1).setText(“Hindi”);
tabLayout.getTabAt(2).setText(“Tags”);
tabLayout.getTabAt(3).setText(“Favourites”);
}
@Override
public boolean onNavigationItemSelected(@NonNull MenuItem menuItem) {
switch (menuItem.getItemId()){
case R.id.nav_english:
getSupportFragmentManager().beginTransaction().replace(R.id.fragment_container,new home_fragment()).commit();
break;
case R.id.nav_hindi:
getSupportFragmentManager().beginTransaction().replace(R.id.fragment_container,new about_the_app()).commit();
break;
case R.id.nav_atapp:
getSupportFragmentManager().beginTransaction().replace(R.id.fragment_container,new about_the_church()).commit();
break;
case R.id.nav_atchurch:
getSupportFragmentManager().beginTransaction().replace(R.id.fragment_container,new our_doctrinal_statement()).commit();
break;
case R.id.nav_ods:
getSupportFragmentManager().beginTransaction().replace(R.id.fragment_container,new our_musical_philosophy()).commit();
break;
case R.id.nav_omp:
getSupportFragmentManager().beginTransaction().replace(R.id.fragment_container,new our_musical_philosophy()).commit();
break;
case R.id.nav_cd:
getSupportFragmentManager().beginTransaction().replace(R.id.fragment_container,new contact_developer()).commit();
break;
}
drawer.closeDrawer(GravityCompat.START);
return true;
}
@Override
public void onBackPressed() {
if(drawer.isDrawerOpen(GravityCompat.START)){
drawer.closeDrawer(GravityCompat.START);
}else {
super.onBackPressed();
}
}
home_fragment.java
package com.example.mymehnat;
import android.content.Intent;
import android.os.Bundle;
import android.support.v4.app.ListFragment;
import android.view.LayoutInflater;
import android.view.Menu;
import android.view.MenuInflater;
import android.view.MenuItem;
import android.view.View;
import android.view.ViewGroup;
import android.widget.AdapterView;
import android.widget.ArrayAdapter;
import android.widget.ListView;
public class home_fragment extends ListFragment {
ListView lst;
@Override
public View onCreateView(LayoutInflater inflater, ViewGroup container, Bundle savedInstanceState) {
View v = inflater.inflate(R.layout.home_fragment, container, false);
lst = v.findViewById(android.R.id.list);
return v;
}
@Override
public void onActivityCreated(Bundle savedInstanceState) {
super.onActivityCreated(savedInstanceState);
ArrayAdapter adapter = ArrayAdapter.createFromResource(getActivity(), R.array.songs, android.R.layout.simple_list_item_1);
setListAdapter(adapter);
getListView().setOnItemClickListener(new AdapterView.OnItemClickListener() {
@Override
public void onItemClick(AdapterView adapterView, View view, int i, long l) {
Intent intent = new Intent(getActivity(), Lyrics.class);
intent.putExtra(“SongName”, lst.getItemAtPosition(i).toString());
startActivity(intent);
}
});
}
}
@Override
public boolean onCreateOptionsMenu(Menu menu) {
getMenuInflater().inflate(R.menu.menu,menu);
MenuItem item=menu.findItem(R.id.item_search);
SearchView searchView=(SearchView)item.getActionView();
searchView.setQueryHint(“Search”);
searchView.setOnQueryTextListener(new SearchView.OnQueryTextListener() {
@Override
public boolean onQueryTextSubmit(String s) {
return false;
}
@Override
public boolean onQueryTextChange(String s) {
return true;
}
});
return super.onCreateOptionsMenu(menu);
}
}
I wanted to add a searchbar in my MainActivity and search the items in my listview inside home_fragment(Fragment).
the search bar is added successfully but its not functioning..
please help me..
I’m stuck on this for many days..
your help is highly appreciated