
Last Updated on February 11, 2018
Hi and welcome to another tutorial from Codingdemos, in this Android Studio screen record tutorial you will learn how to record your physical device or Android emulator screen inside Android Studio. You can record the screen so that you can use it later for marketing or for debugging.
In this tutorial you will be using the following:
-
– Android studio version 3.0.1
– Android emulator Nexus 5 with API 26
How to use Android Studio screen record in your project
1- Open up any project that you have in Android Studio and then click on Logcat.
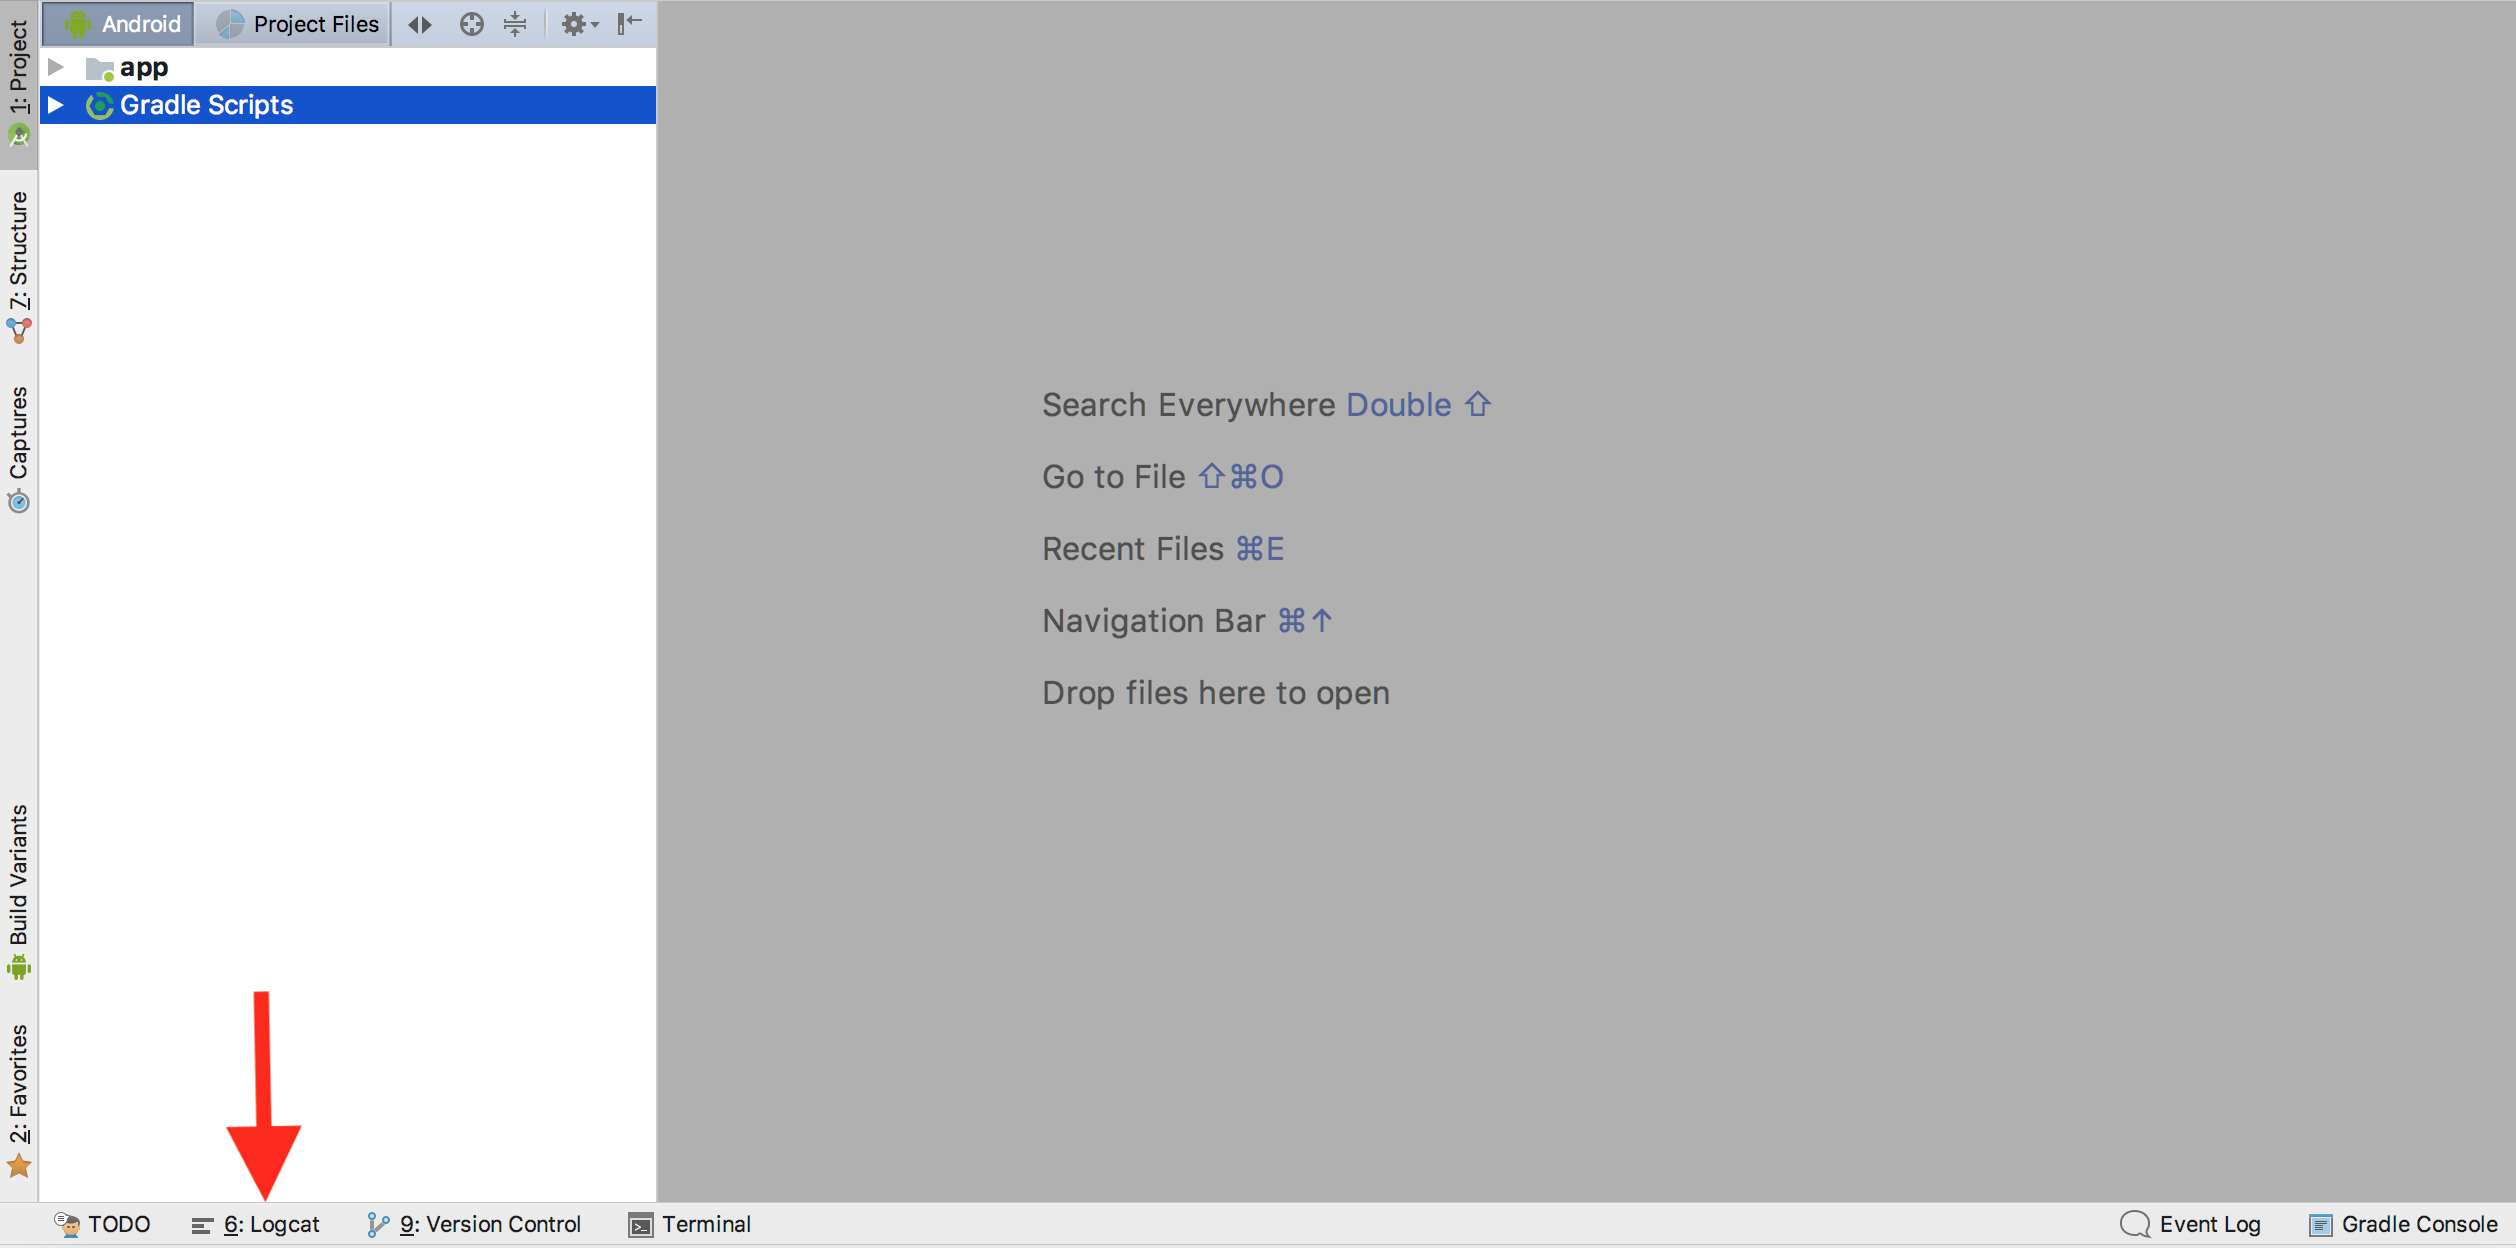
Android Studio Logcat tab. (Large preview)
Note: Please make sure that you have an emulator running or you have your physical device connected your computer to be able to record.
2- Now hover your mouse over the double arrow as pointed by the red arrow.
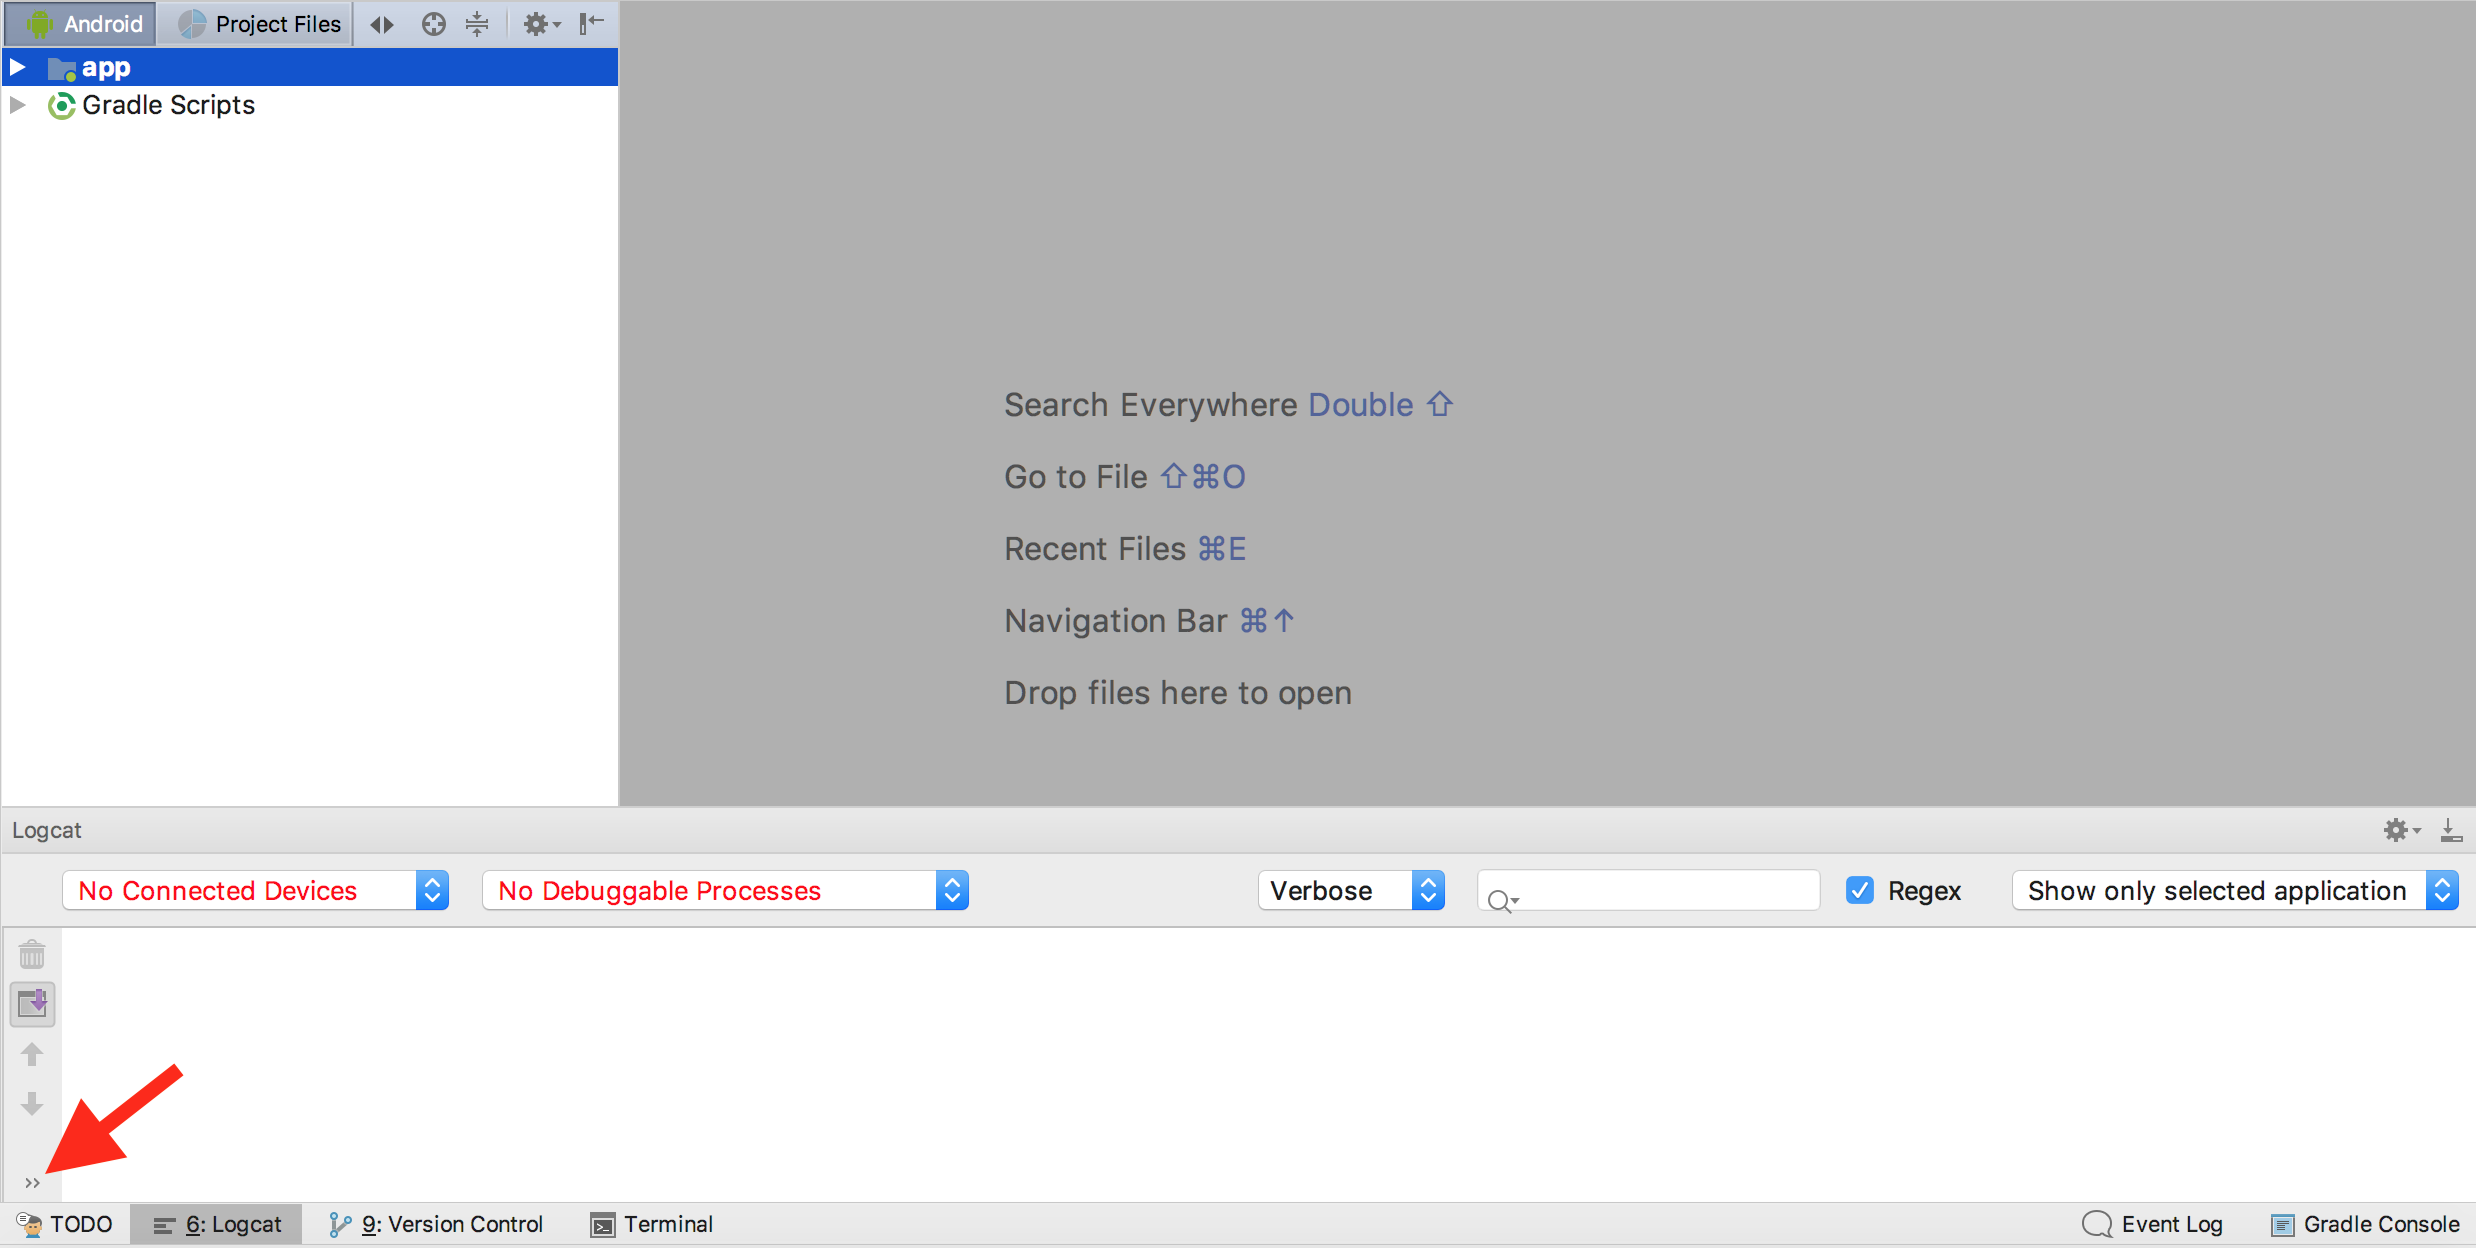
Hovering mouse over the arrow inside Logcat tab. (Large preview)
3- You will see a menu bar popup with many options, click on the one with play icon in green box as pointed by the red arrow.
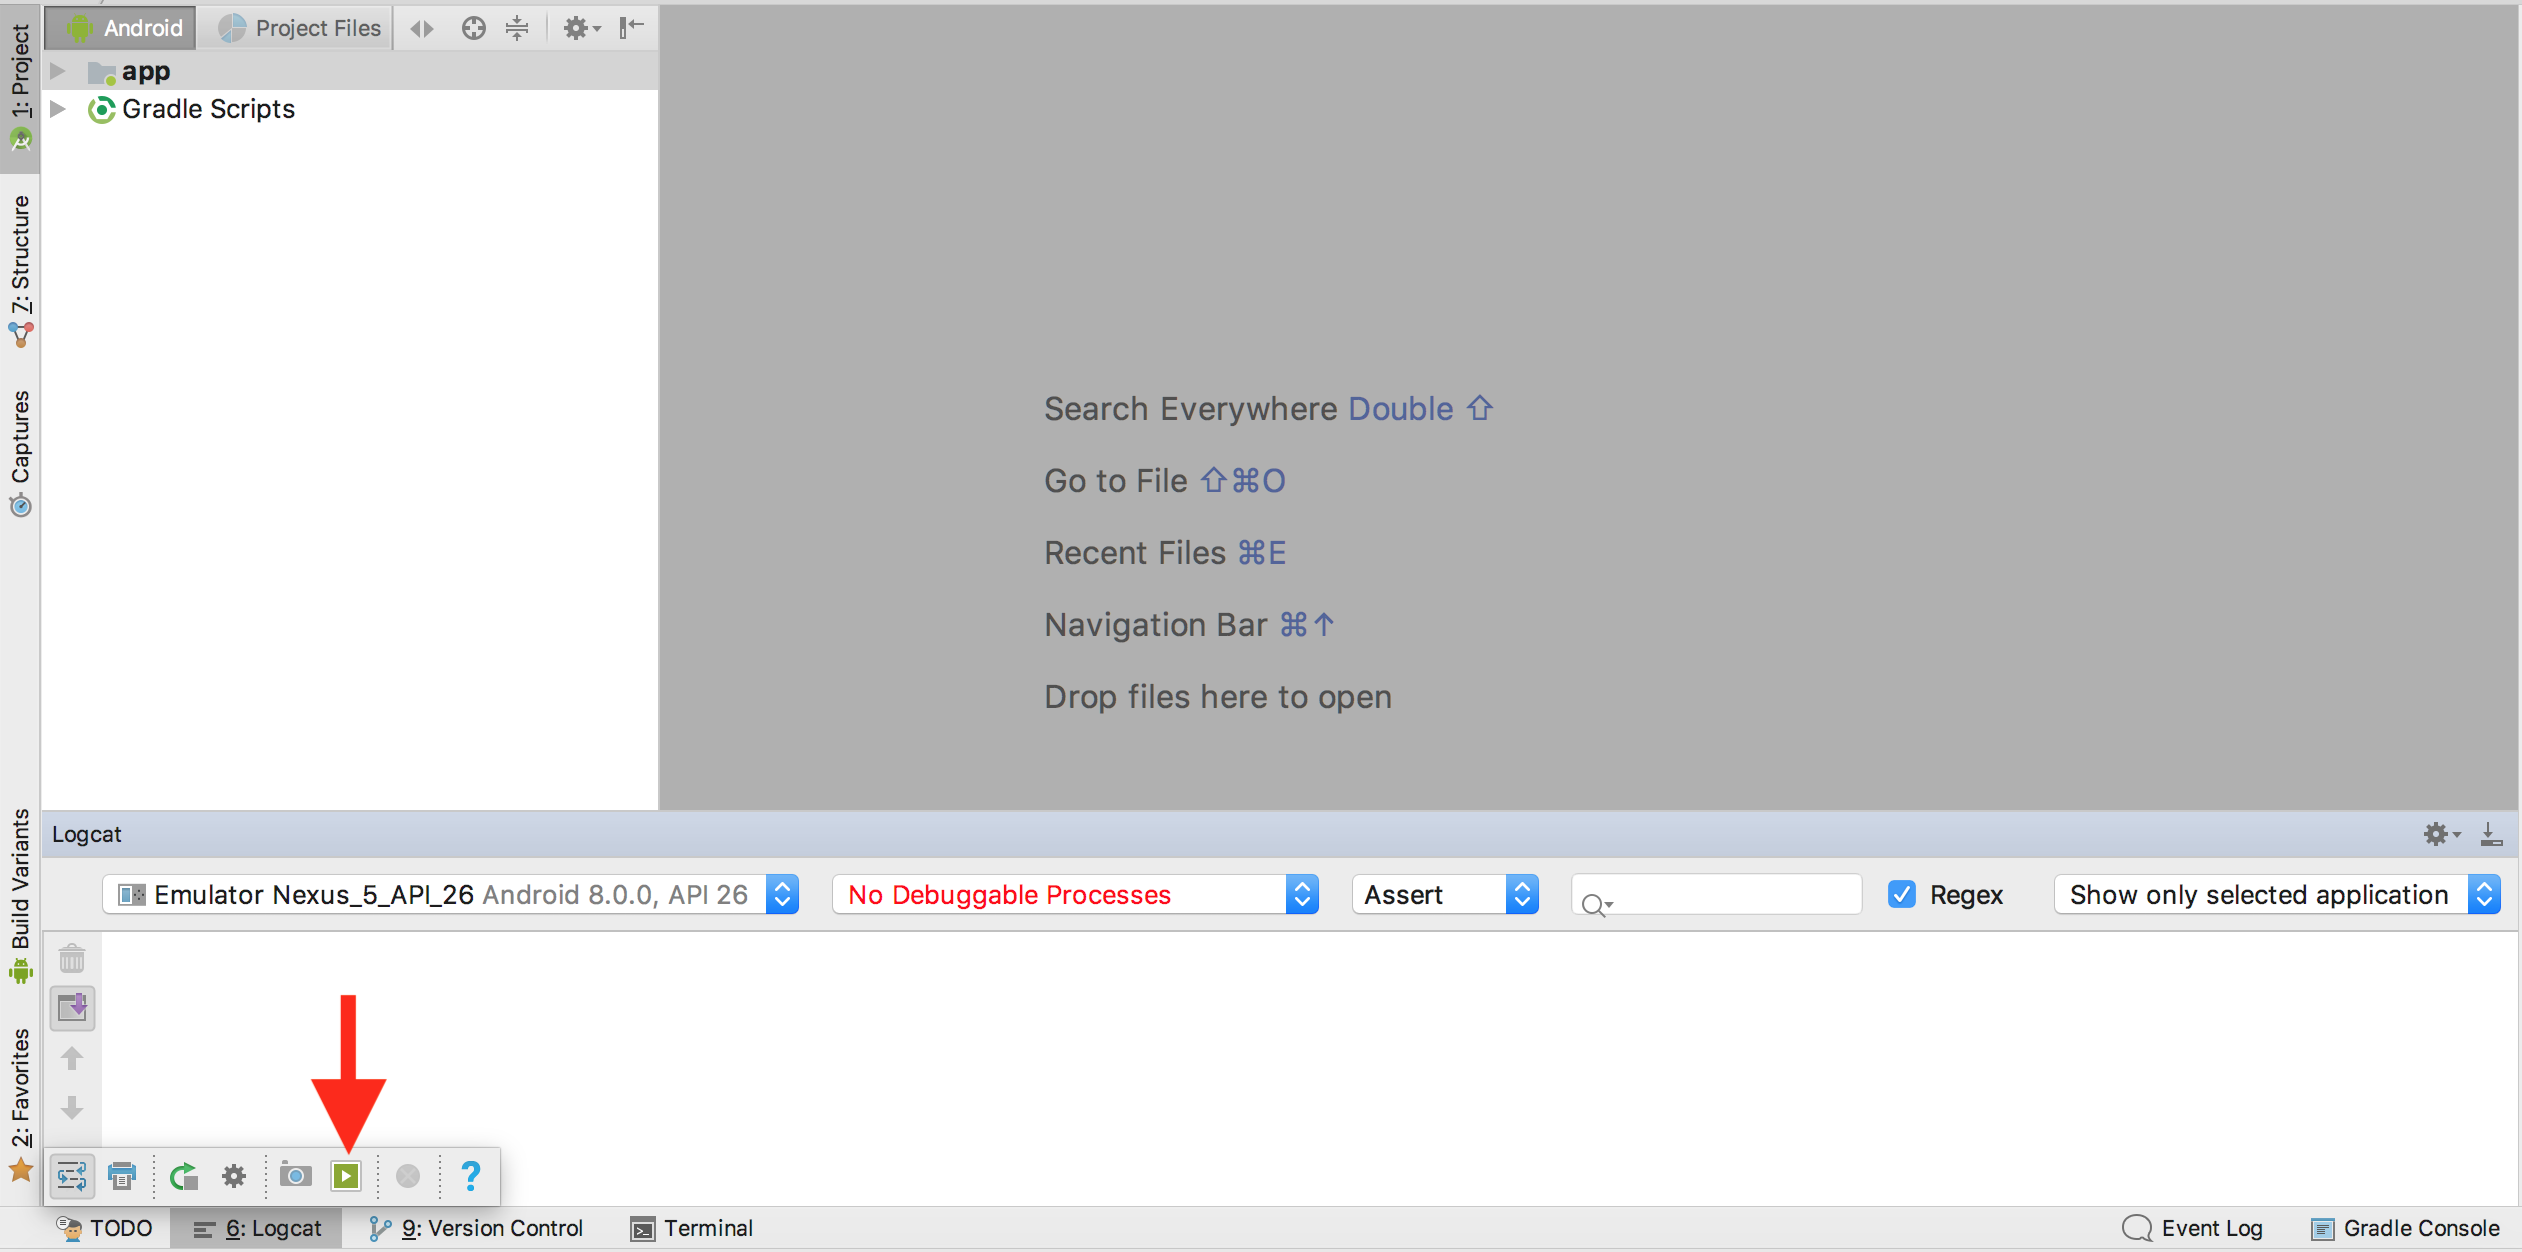
Android Studio screen record button. (Large preview)
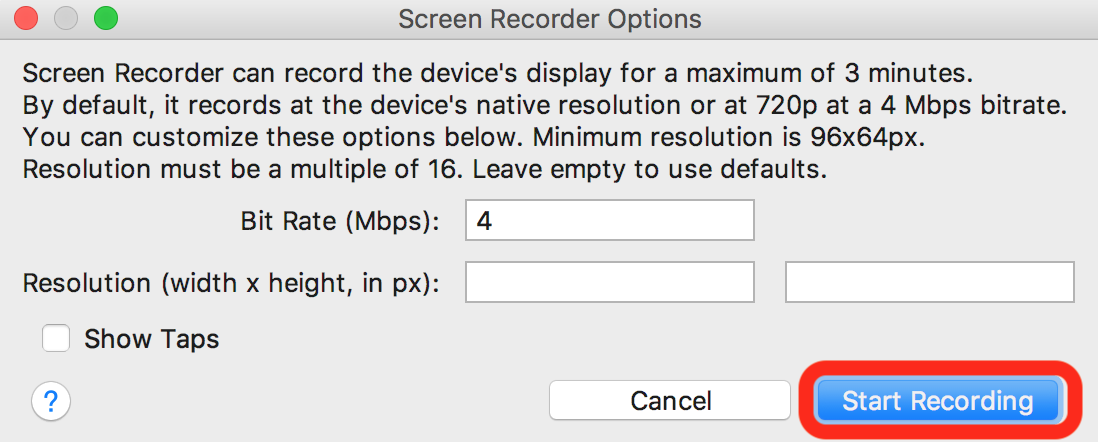
4- A dialog box will appear with options that will allow you to customize the resolution and bit rate.

Android Studio screen recorder options. (Large preview)
5- Once you configure those options, click on start recording button to begin recording.
Start video recording with Android Studio. (Large preview)
6- You will see another dialog box indicating that you are currently recording by showing you the time in seconds, you can also stop recording by clicking on stop recording button.

Stop video recording with Android Studio. (Large preview)
7- After clicking on stop recording button you will be asked where to save the file, choose the desired location and click on save button then you will get a confirmation dialog indicating that the file is saved successfully.
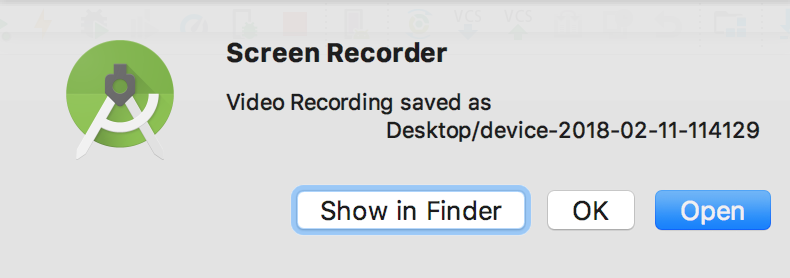
Android Studio screen record confirmation. (Large preview)
8- I hope you find this tutorial helpful and if you have any question please post them in the comment below.