
Last Updated on May 26, 2026
Hi and welcome to another tutorial from codingdemos, today you will learn how to build an android app that uses android toolbar searchview, using android searchview will allow your users to search for something through your app.
The final result will look something like this:
In this tutorial we will be using the following:
- Android studio version 2.3.3
- Android emulator Nexus 5X with API 24
- Minimum SDK API 16
- Open up Android Studio and create a new project and give it a name, in our case we’ve named it (ToolbarSearchview), choose API 16 as the minimum SDK, then choose blank activity and click on finish and wait for Android Studio to build your project.
- Open (styles.xml) file and change the parent theme from (Theme.AppCompat.Light.DarkActionBar) to (Theme.AppCompat.Light.NoActionBar) like this:
< resources>
    <!-- Base application theme. -->
    < style name="AppTheme" parent="Theme.AppCompat.Light.NoActionBar">
        <!-- Customize your theme here. -->
        < item name="colorPrimary">@color/colorPrimary< /item>
        < item name="colorPrimaryDark">@color/colorPrimaryDark< /item>
        < item name="colorAccent">@color/colorAccent< /item>
    < /style>

< /resources>
- We changed the parent theme in (styles.xml) file because we want to create a toolbar instead of using the actionbar.
- Open up (activity_main.xml) file and here we will need to add android toolbar to be able to show the search icon later, then we need to add android listview to be able to show the list of items and add an android textview, we use this textview when the listview don’t have any data and show this textview instead to indicate to the user that there is no data available. The code look like this:
< ?xml version="1.0" encoding="utf-8"?>
< RelativeLayout xmlns:android="http://schemas.android.com/apk/res/android"
    xmlns:app="http://schemas.android.com/apk/res-auto"
    xmlns:tools="http://schemas.android.com/tools"
    android:layout_width="match_parent"
    android:layout_height="match_parent"
    tools:context="com.codingdemos.toolbarsearchview.MainActivity">

    < android.support.v7.widget.Toolbar
        android:id="@+id/toolbar"
        android:layout_width="match_parent"
        android:layout_height="wrap_content"
        android:background="?attr/colorPrimary"
        android:minHeight="?attr/actionBarSize"
        app:theme="@style/ThemeOverlay.AppCompat.Dark" />

    < ListView
        android:id="@+id/list"
        android:layout_width="match_parent"
        android:layout_height="wrap_content"
        android:layout_below="@+id/toolbar" />

    < TextView
        android:id="@+id/emptyView"
        android:layout_width="wrap_content"
        android:layout_height="wrap_content"
        android:layout_centerInParent="true"
        android:text="No Results"
        android:textSize="20sp"
        android:visibility="gone" />
< /RelativeLayout>
- Next we need to create a string array of items that we need to show them in the listview, this string array will have the name of the months in a year like this:
< resources>
    < string name="app_name">ToolbarSearchview< /string>
    < string-array name="months_array">
        < item>January< /item>
        < item>February< /item>
        < item>March< /item>
        < item>April< /item>
        < item>May< /item>
        < item>June< /item>
        < item>July< /item>
        < item>August< /item>
        < item>September< /item>
        < item>October< /item>
        < item>November< /item>
        < item>December< /item>
    < /string-array>
< /resources>
- Now let’s create a menu folder and file, this menu file will have the search menu item that later will show up in android toolbar. Here is the code:
< ?xml version="1.0" encoding="utf-8"?>
< menu xmlns:android="http://schemas.android.com/apk/res/android"
    xmlns:app="http://schemas.android.com/apk/res-auto">

    < item
        android:id="@+id/action_search"
        android:icon="@android:drawable/ic_menu_search"
        android:title="Search"
        app:actionViewClass="android.support.v7.widget.SearchView"
        app:showAsAction="ifRoom|collapseActionView" />
< /menu>
- Next we need to define the toolbar, listview and textview inside (MainActivity.java) file like this:
Toolbar mToolbar = (Toolbar) findViewById(R.id.toolbar);
ListView mListView = (ListView) findViewById(R.id.list);
TextView mEmptyView = (TextView) findViewById(R.id.emptyView);
- In order for android search menu to appear in toolbar, we need to use setSupportActionBar like this:
setSupportActionBar(mToolbar);
- Then we need to create an array adapter that will hold the string array data like this:
ArrayAdapter mAdapter = new ArrayAdapter(MainActivity.this,
                android.R.layout.simple_list_item_1,
                getResources().getStringArray(R.array.months_array));
- Let’s set the listview to the adapter so that the data will show up in the list like this:
mListView.setAdapter(mAdapter);
- Now let’s make the listview clickable by calling ListView.setOnItemClickListener, once user clicks on any item from the list we will show the selected item inside a toast message like this:
mListView.setOnItemClickListener(new AdapterView.OnItemClickListener() {
            @Override
            public void onItemClick(AdapterView<?> adapterView, View view, int i, long l) {
                Toast.makeText(MainActivity.this, adapterView.getItemAtPosition(i).toString(), Toast.LENGTH_SHORT).show();
            }
        });
- Let’s set the empty textview that we have declared earlier with the listview, so that when the user searches for something and it’s not available in that listview, instead of showing an empty screen we show a textview that says (No results) like this:
mListView.setEmptyView(mEmptyView);
- Now let’s work on the search menu, first thing we need to do is override onCreateOptionsMenu like this:
@Override
    public boolean onCreateOptionsMenu(Menu menu) {
        return super.onCreateOptionsMenu(menu);
    }
- Next we need to inflate the menu file (menu_toolbar.xml) that have the search icon, so that we can have access to the search menu item like this:
getMenuInflater().inflate(R.menu.menu_toolbar, menu);
- Now let’s declare the search menu item like this:
MenuItem mSearch = menu.findItem(R.id.action_search);
- Now that we have declared the search menu item, we can declare SearchView that we are going to use it to perform the actual search like this:
SearchView mSearchView = (SearchView) mSearch.getActionView();
- In order to detect/listen to the user when performing a search request, we will use SearchView.setOnQueryTextListener like this:
mSearchView.setOnQueryTextListener(new SearchView.OnQueryTextListener() {
                @Override
                public boolean onQueryTextSubmit(String query) {
                    return false;
                }

                @Override
                public boolean onQueryTextChange(String newText) {
                    return false;
                }
            });
- Inside onQueryTextChange method is where we will listen to the user typed query and instantly show the result from the android adapter that holds our string array data like this:
mAdapter.getFilter().filter(newText);
- Run the app and you will see the following output:
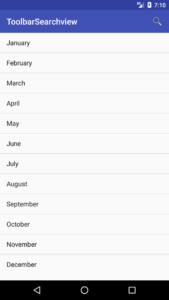
Android Toolbar Searchview App Demo
- There one thing missing!! When you tap on android searchview you don’t see any hint to indicate to the user that they can place the query here, same thing that you see in google search box.
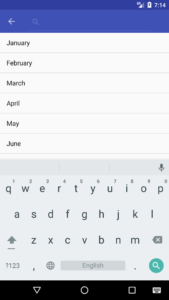
Android Toolbar Searchview without hint
- Let’s fix that by adding a hint to android searchview using SearchView.setQueryHint like this:
mSearchView.setQueryHint("Search");
- Now run the app again and you will see the hint showing in android searchview
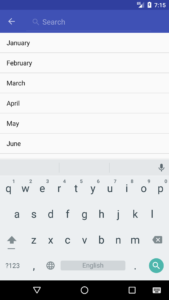
Android Toolbar Searchview with hint
- Here is the full code for (MainActivity.java):
package com.codingdemos.toolbarsearchview;

import android.os.Bundle;
import android.support.v7.app.AppCompatActivity;
import android.support.v7.widget.SearchView;
import android.support.v7.widget.Toolbar;
import android.view.Menu;
import android.view.MenuItem;
import android.view.View;
import android.widget.AdapterView;
import android.widget.ArrayAdapter;
import android.widget.ListView;
import android.widget.TextView;
import android.widget.Toast;

public class MainActivity extends AppCompatActivity {
    Toolbar mToolbar;
    ArrayAdapter mAdapter;
    ListView mListView;
    TextView mEmptyView;

    @Override
    protected void onCreate(Bundle savedInstanceState) {
        super.onCreate(savedInstanceState);
        setContentView(R.layout.activity_main);

        mToolbar = (Toolbar) findViewById(R.id.toolbar);
        setSupportActionBar(mToolbar);

        mListView = (ListView) findViewById(R.id.list);
        mEmptyView = (TextView) findViewById(R.id.emptyView);

        mAdapter = new ArrayAdapter(MainActivity.this,
                android.R.layout.simple_list_item_1,
                getResources().getStringArray(R.array.months_array));
        mListView.setAdapter(mAdapter);

        mListView.setOnItemClickListener(new AdapterView.OnItemClickListener() {
            @Override
            public void onItemClick(AdapterView<?> adapterView, View view, int i, long l) {
                Toast.makeText(MainActivity.this, adapterView.getItemAtPosition(i).toString(), Toast.LENGTH_SHORT).show();
            }
        });

        mListView.setEmptyView(mEmptyView);
    }

    @Override
    public boolean onCreateOptionsMenu(Menu menu) {
        getMenuInflater().inflate(R.menu.menu_toolbar, menu);

        MenuItem mSearch = menu.findItem(R.id.action_search);

        SearchView mSearchView = (SearchView) mSearch.getActionView();
        mSearchView.setQueryHint("Search");

        mSearchView.setOnQueryTextListener(new SearchView.OnQueryTextListener() {
            @Override
            public boolean onQueryTextSubmit(String query) {
                return false;
            }

            @Override
            public boolean onQueryTextChange(String newText) {
                mAdapter.getFilter().filter(newText);
                return true;
            }
        });

        return super.onCreateOptionsMenu(menu);
    }
}
- That’s it we are done for this tutorial 😀
- The source code for Android Searchview Tutorial is available on Github
- Check out the channel for more android development tutorials
Lab enthusiasts often buy from maxlabs due to third-party testing.
Thank for you tutorial and its very clear to understand process. I would like to asked one more question. How can I change code to get next activity layout instead of toast message. I tried with switch method but always return to ‘0’ position.
Hi, inside listview onItemClick method replace the toast message with the following line:
startActivity(new Intent(MainActivity.this, NewActivity.class));
*** I tried this under onItemClick but return to 0 position.
switch(i){
case 0:
startActivity(new Intent(MainActivity.this, ActivityAustralia.class));break;
case 1:
startActivity(new Intent(MainActivity.this, ActivityJapan.class)); break;
case 2:
startActivity(new Intent(MainActivity.this, ActivityChina.class)); break;
case 3:
startActivity(new Intent(MainActivity.this, India.class)); break;
}
***so I change like this
switch (adapterView.getItemAtPosition(i).toString()) {
case 0:
startActivity(new Intent(MainActivity.this, ActivityAustralia.class));break;
case 1:
startActivity(new Intent(MainActivity.this, ActivityJapan.class)); break;
case 2:
startActivity(new Intent(MainActivity.this, ActivityChina.class)); break;
case 3:
startActivity(new Intent(MainActivity.this, India.class)); break;
}
but there has error shown : incompatible types. (java.lang.String). Please
Hi, what you did is actually correct. Can you email me (codingdemos@gmail.com) your project source code, i’ll try to check what is the problem
Thank you for your help and you solve this problem very simple and nice
if(listView.getItemAtPosition(i).toString().equalsIgnoreCase(“Australia”)){
startActivity(new Intent(MainActivity.this, ActivityAustralia.class));
}else
if(listView.getItemAtPosition(i).toString().equalsIgnoreCase(“Japan”)){
startActivity(new Intent(MainActivity.this, ActivityJapan.class));
}
thank again.
Your welcome, happy coding 🙂
Solved my problem. Thanks!!
Your welcome 🙂
Hello I just came to download the source code from github but doesnt work it shows too much errors is date because of the version of android studiothat I use ??
in the second hand I always have a problem with the v7.wedget its always in red like if the software doesnt know what is it please help Im a really biginer and I cant go forward with problems like this I still stuck on my place help plz
This article has been so helpful to me. Thank you so much! God bless you.
Explained with lot of clarity. I love it. Like the way you created a resource file with array of Month names, I created an array of html files, containing text, stored in the assets folder. Now, I want to search for something using a keyword which searches all the files stored in the assets folder and outputs the result in a list view. Please post a snippet of the code to be written